Sparta, WI, August 2025
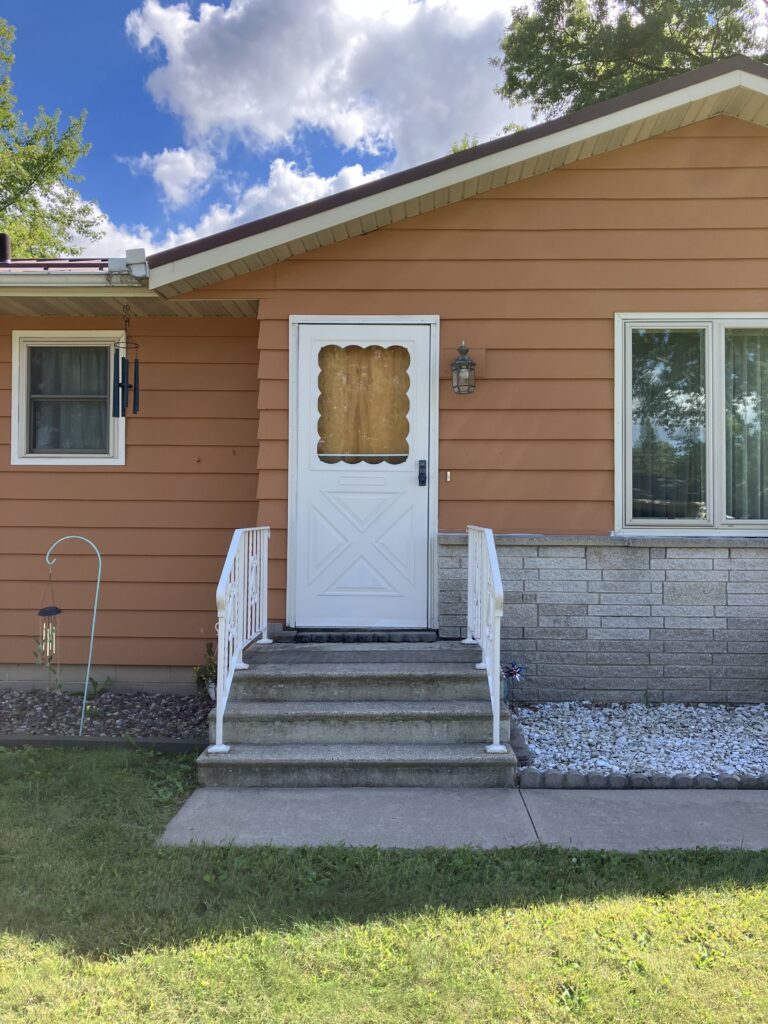
Earlier this year, mom asked if John and I could look at the front door. She was hoping we could rescue it from water damage. Ken (the handyman that helps mom) said the door only needed sanding and varnishing.
Mom’s house was built in the mid 60s. All the doors are still original and match. Unfortunately, it rained and the front door screen window was down. Between the rain and 60 years of sun, the exterior varnish had cracked, lost its shine, and was lighter in color in the area where light came through the screen door window.
We had a few options. Replace the door or refinish the door. The best option was to refinish the door to continue having matching doors throughout the house.
That is when I learned about Spar Varnish. Spar Varnish:
- is a specialized wood finish that was developed for the marine industry. Spar stands for a sailing vessel mast and poles
- is made with resins, oils and UV inhibitors.
- provides superior moisture resistance, flexibility and durability
- is ideal for harsh environments such as sunlight and moisture
- creates a hard moisture resistant coating that protects wood surfaces from water penetration and UV degradation
This brings up the question – “Are we working on a house door or a sailboat?” Maybe we plan to sail the door around the world 🙂
It turns out the more popular water-based polyurethane varnish is great to use for clean-ability, fast drying, and doesn’t yellow over time. On the flip-side, it should primarily be used for interior surfaces. As John would say, “womp womp”. Water-based varnish would not be a good solution for the front door. Plus, we believe an oil-based varnish was used when door was made in mid the 60s. From my understanding, you can’t mix oil and water finishes.
Spar Varnish isn’t something you can just purchase at most “do it” stores or home improvement stores. It needs to be purchased online and shipped. We ordered the spar varnish, and we had it shipped to mom’s house.
When John removed the door, we discovered the door is solid wood with a laminate on top. We thought the laminate was 1/16 of an inch or thicker, but it turns out the laminate wasn’t as thick as we hoped. It was wafer thin, so John had to be very careful when sanding.
Dawson had electric sanders that we borrowed for the job. Otherwise, sanding the entire door by hand would have taken forever.
Unfortunately, I don’t have a picture of the door before John started working on it. The pictures below were taken as John was working.
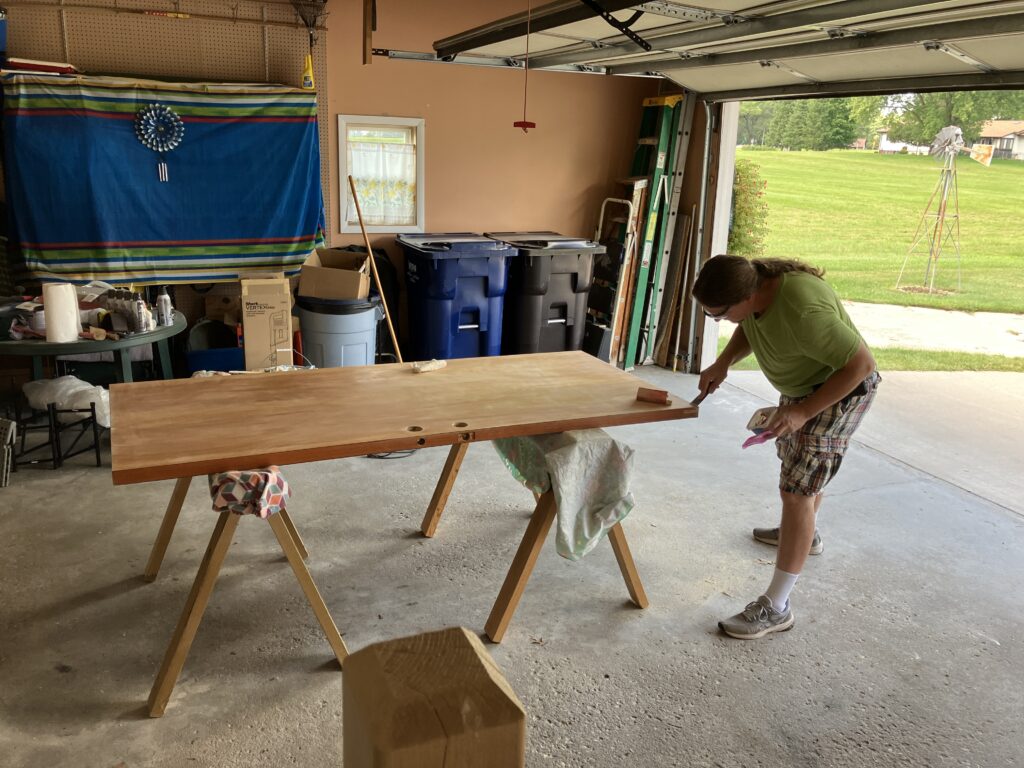
After John removed the knob and other parts, He started sanding with electric sander & by hand. The key was to not sand past the laminate. Because the door laminate had cracks in it, John had to use wood putty to fill in the cracks. Normally, John would sand to remove the cracks, but he was limited by the thinness of the laminate.
Once the wood filler was dry, John sanded the door again. Then, we applied a natural wood stain. (We because I helped with staining the door.) We used a natural toned stain to avoid making some areas too dark compared to before. Afterward, we felt that we should have used a yellow pine stain or wood putty. Varnish is known for turning slightly yellow over time. We are hoping the varnish will yellow to match the color better. 🙂

Once we added the varnish, we learned a key difference between the spar varnish and the water base varnish. For spar Varnish:
- 3+ coats should be applied.
- You need to wait 8 hours between coats.
- If 12 hours elapse between coats, the varnish needs a light sanding
- After the last coat, it takes 72 hours for the varnish to dry and cure. Water base polyurethane varnish dries fast.
So, now we are in the dilemma — no front door for four days.
Fortunately, the door from the kitchen to the basement was not on and the door was in the basement. We were able to use basement door temporarily until the front door dried.
Next, we came up with a schedule to go to mom’s house and varnish. Unfortunately, the gnats also liked the varnish. Before each coat, we had to pick off gnats that became stuck to the door.
In the end, I think the door turned out really nice. John did a great job!!

