Cats are curious.
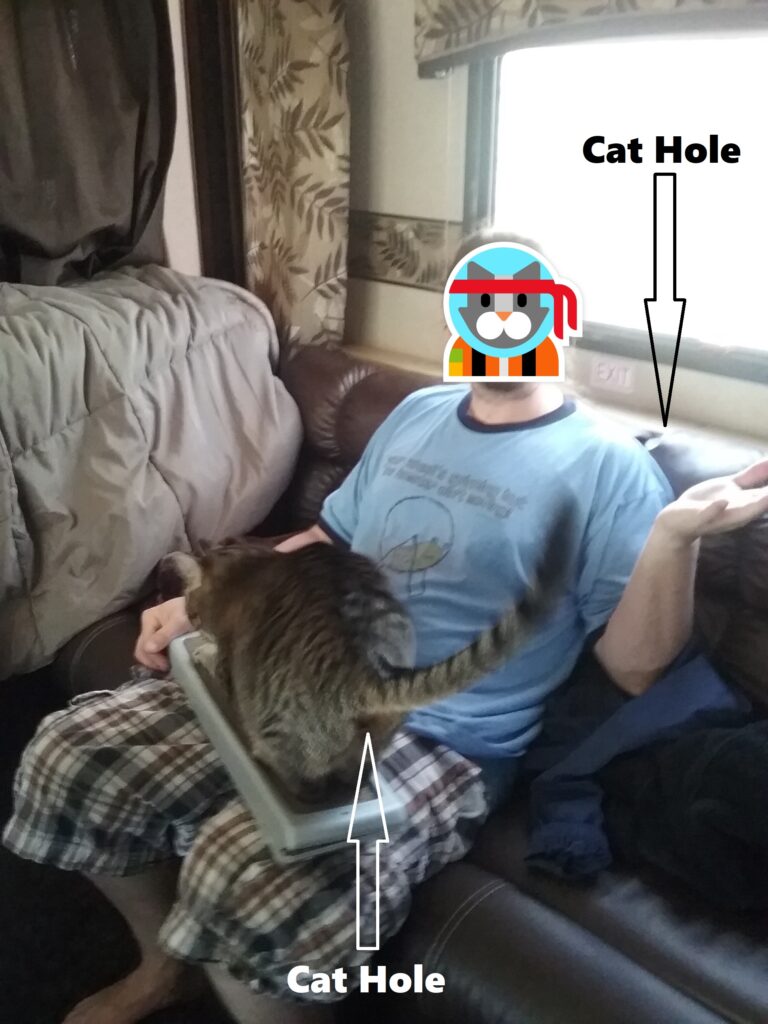
Cats climb.
Cats explore.
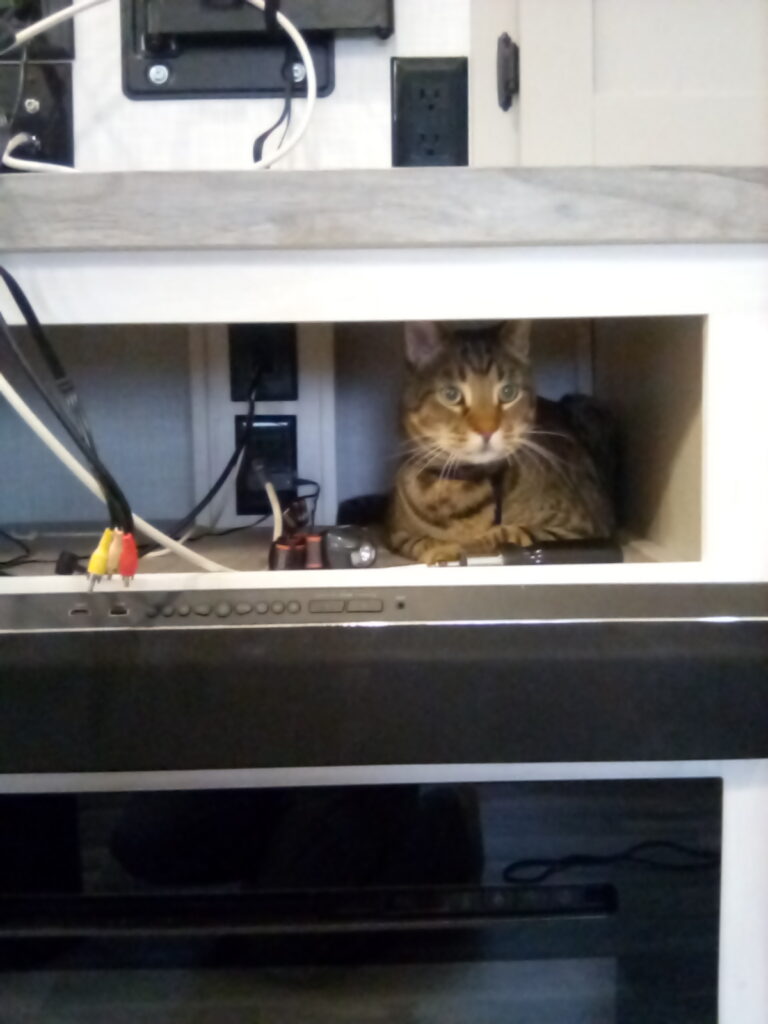
Cats hide.
RVs are not designed for cats.
Introduction
It should surprise no one, but RVs frequently have superficial and incomplete decor. Manufacturers want to keep the feature count up and the cost/weight down. As travel trailers get smaller and cheaper, the number of cat safety issues seem to increase, but it will vary by manufacturer and model. The need to make the trailers ultralight with multi-purpose interiors leads to cubby holes and secret passages for cats. We do not know if “smaller and cheaper RVs have more pet concerns” applies only to travel trailers, but it is likely to be similar for other styles of RV. When we upgraded to a larger RV, we looked mostly at 32+’ fifth wheels. We spent very little time looking at motorized RVs (i.e., class A, class C, or Vans).
In the worst case, your cat can get into places that are not safe, get hurt, and you can not get to them. In the best case, your cat is too fat and lazy to explore. In the most probable case, your cat will dive into the guts of your RV the moment you plan to leave for home. This can lead to intense frustration and a desire to shave your cat in retribution. For your own sanity and safety of your cat, you should look for potential issues when searching for an RV, and you should plan to address those issues from the beginning. In each RV we owned, we have had at least one example of this type of problem.
In our first RV, we came back from hiking, and we could not find MacKie. We searched our 21′ trailer for 15 minutes and wandered around outside yelling for him. We finally remembered that the back wall had gap about 6 inches wide for the slide mechanism, wiring, and plumbing. It only had a thin leather curtain hanging over it. We pulled it aside, and Mackie was looking up at us with a grease stain on his head. We had to open up the water heater compartment and wave treats around to get him out. MacKie could have damaged the RV or been hurt inside that space, so I had to build a cover over the hole that would not interfere with the slide mechanism.
In our second RV, we took the cats inside to explore the RV the first time. Cleo promptly flattened down to about 3 inches tall and “swam” under the fireplace cabinet. Fortunately, all of the serious safety issues had already been addressed. The cubby hole was not obviously unsafe, but we did not want Cleo hanging out under the fireplace. I could have put up a simple wall, but instead, I turned it into 3″ tall drawers for board games and card games.
We still have some cubby holes (e.g., the loft, bedroom windows ledge, under table) that we have to pry the cats out of on moving day. These are places the cats like to sleep or hide and are not a safety issue. On moving day, we try to get them into the truck after breakfast and before they dive into a hiding spot. Sometimes we even succeed.
The following are some areas to investigate that might pose cat safety issues along with ideas for addressing them.
Cabinets and Drawers
Often the storage spaces are made to look like cabinets, but they are just one large framed out space made to look like cabinets from the outside. This interior cabinet space can lead behind drawers, into other cabinets with hazardous items or chemicals, or into exterior storage space. No one wants to open an outdoor storage door only to have a scared cat pop out. (OK, maybe someone does, but I do not like them very much.)
Plumbing in cabinets can be an issue too. Cutting one or more circular holes through the sub-flooring to run pipes, water lines, and electricity seems common in RVs. In places where several of these come together (e.g., a kitchen or bathroom cabinet), the combined holes can be large. A small cat or large hole can lead to a cat getting under the sub-flooring. You probably do not want to fish your cat out of the sub-flooring of the RV. This might be more of an issue for RVs with heated and enclosed undersides. We have not explored the interiors and undersides of enough RVs with open undersides to know if there are holes that would let a cat get to the outside.
Our cats are not interested in cabinets, unless they are open. We just keep the cabinets closed, and this is not a problem for us. For cats that open cabinets, the simplest solution would be using commercially available child-safe or pet-safe latches. The more time consuming solution is to build a lightweight wall between the cabinet interior and the unsafe space. A 1″ x 1″ wood frame with 5mm sub-flooring is about as lightweight as you can manage without using plastic. Many interior storage areas of our RV were constructed by the manufacturer using 1″ x 1″ framing. TIP: If you have a table saw with a 1/8″ wide blade, ripping a 1″ x 3″ pine board into three is a fairly cheap way to get the 1″x1″ interior frame boards. A 1″ x 2″ works, but one side is 1/16″ too short. Home Depot used to sell 1″x1″ poplar by the linear foot at a reasonable price. With sky rocketing wood prices, this is no longer affordable.
Furniture
Stand alone furniture is typically no less safe than what is in your house (e.g., a cat in the recliner mechanism). Built-in furniture can be a cat or RV safety issue. The built-in benches, chairs, couches, and beds are often constructed to hide indoor/outdoor storage, pipes, vents, water lines, and electrical wires. They can be incomplete on the inside with paths leading to other compartments, a danger to the cat, or a danger to the RV. The compartments can bridge inside and outside storage. Couches can have gaps between the backrest and wall through which cats can fall or get stuck. Whether it is easier to close off access into the furniture or access from inside the furniture to other compartments may vary by situation.
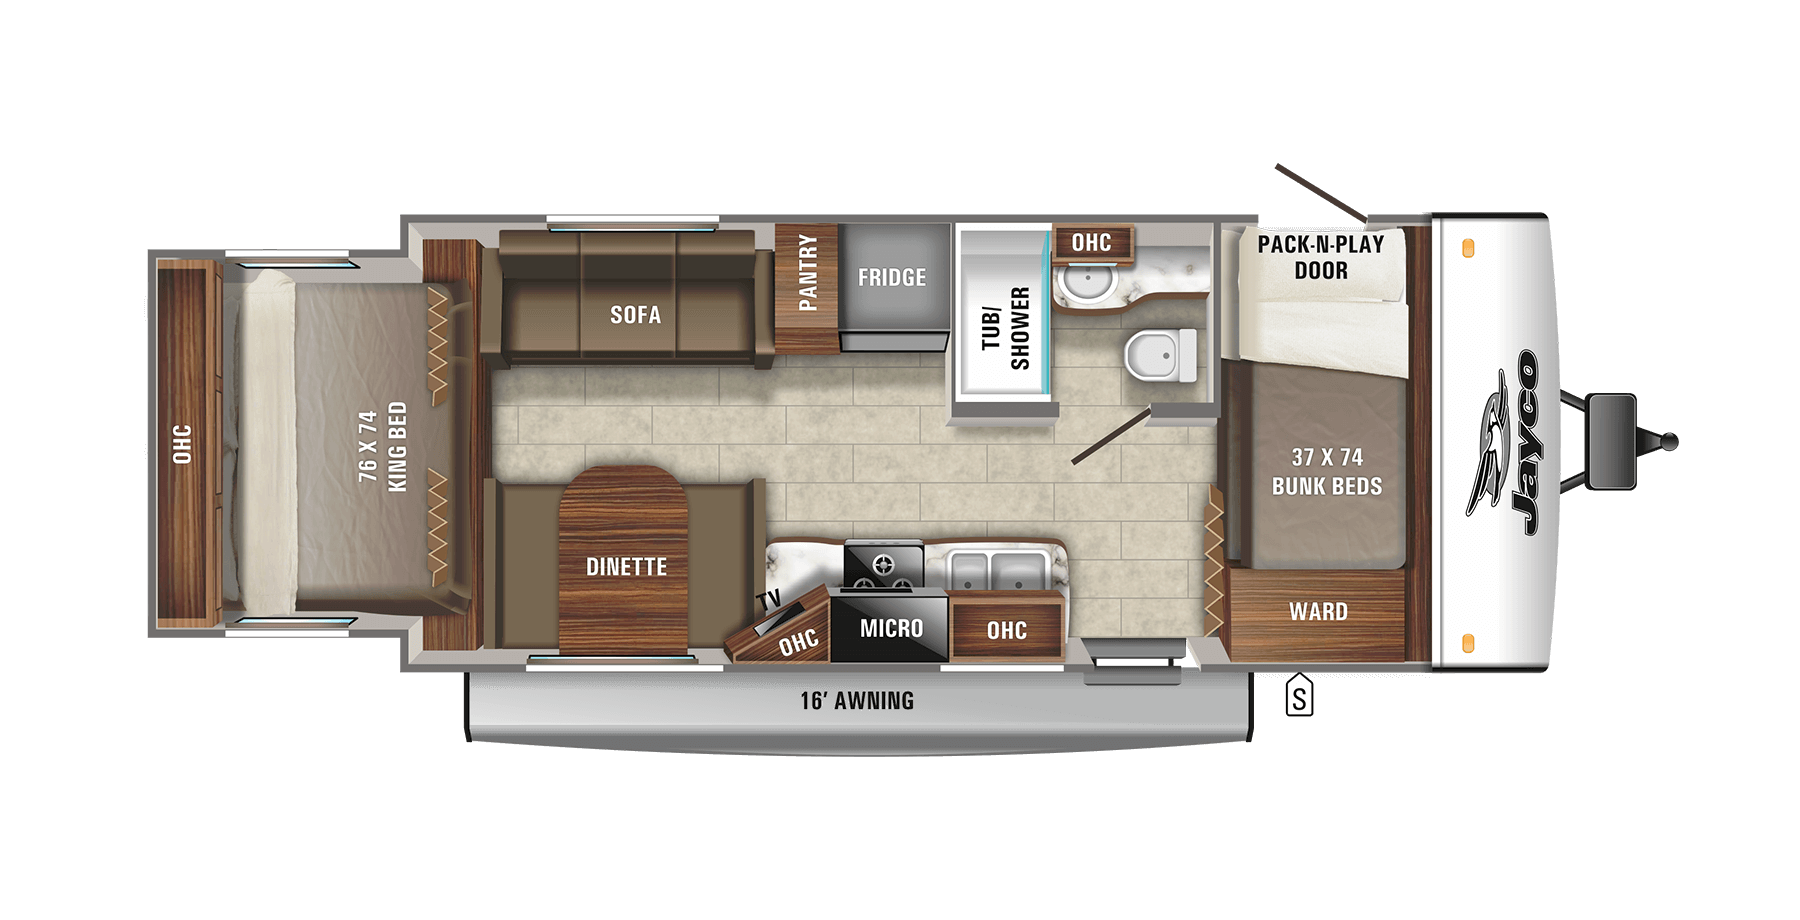
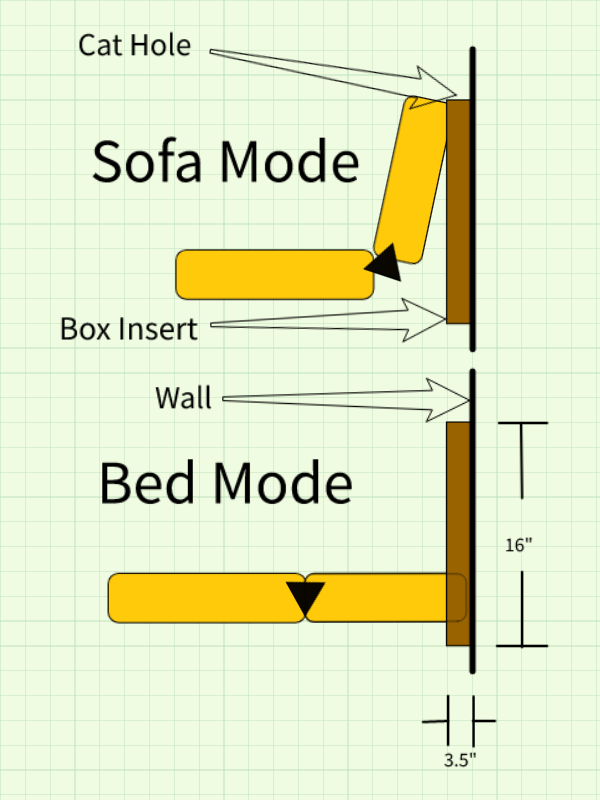
One of the best examples we have for this is from our first RV, the Jayco Jay Feather X213. It had a jackknife sleeper sofa across from the table and TV, which was very similar to the RecPro Charles 62″ RV Jackknife Sleeper Sofa. When it was in the bed position, it was tight against the wall. When it was in the sofa position, there was a 3″ to 4″ gap between the wall and the sofa. Our cats like to get on the back of recliners and sofas to look out windows and sleep. The gap led to our delicate foil wrapped ventilation pipe that would get mutilated by an aggravated cat. It also had an 8″ barrier to block a 12″ gap into the storage under the couch.
We needed to make the couch back safe for the cats, keep the sleeper sofa usable, and allow the cats to look out the window. Behind the couch on either side were outcroppings slightly lower than the bottom of the sofa bed. This allowed us to build a long flat box box without a front or back that was roughly 64″ x 16″ x 3.5″. (You should measure your sofa to verify those lengths.) The box sat on the 64″ side behind the sofa back. Being slightly wider than the sofa meant that the the 16″ sides rose on either side of the sofa back. The other 64″ side sat at the height of the top of the sofa back. The cats could safely sit on the top edge of the box, and they could not fit behind the couch through the space left by the box. Additionally, the sofa could be dropped down between the box sides to make a spare bed. In the picture above, the board behind the sofa and below the window is the top of the box insert. The box was inserted on arrival and removed on departure to avoid interfering with the slide.
Windows and Doors
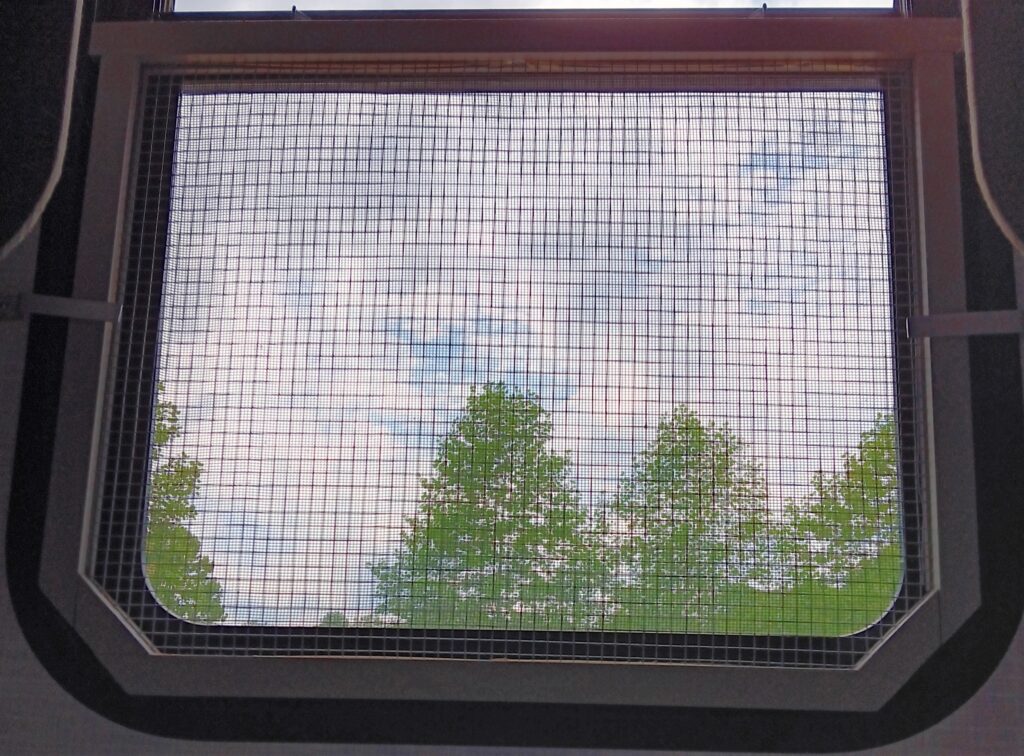
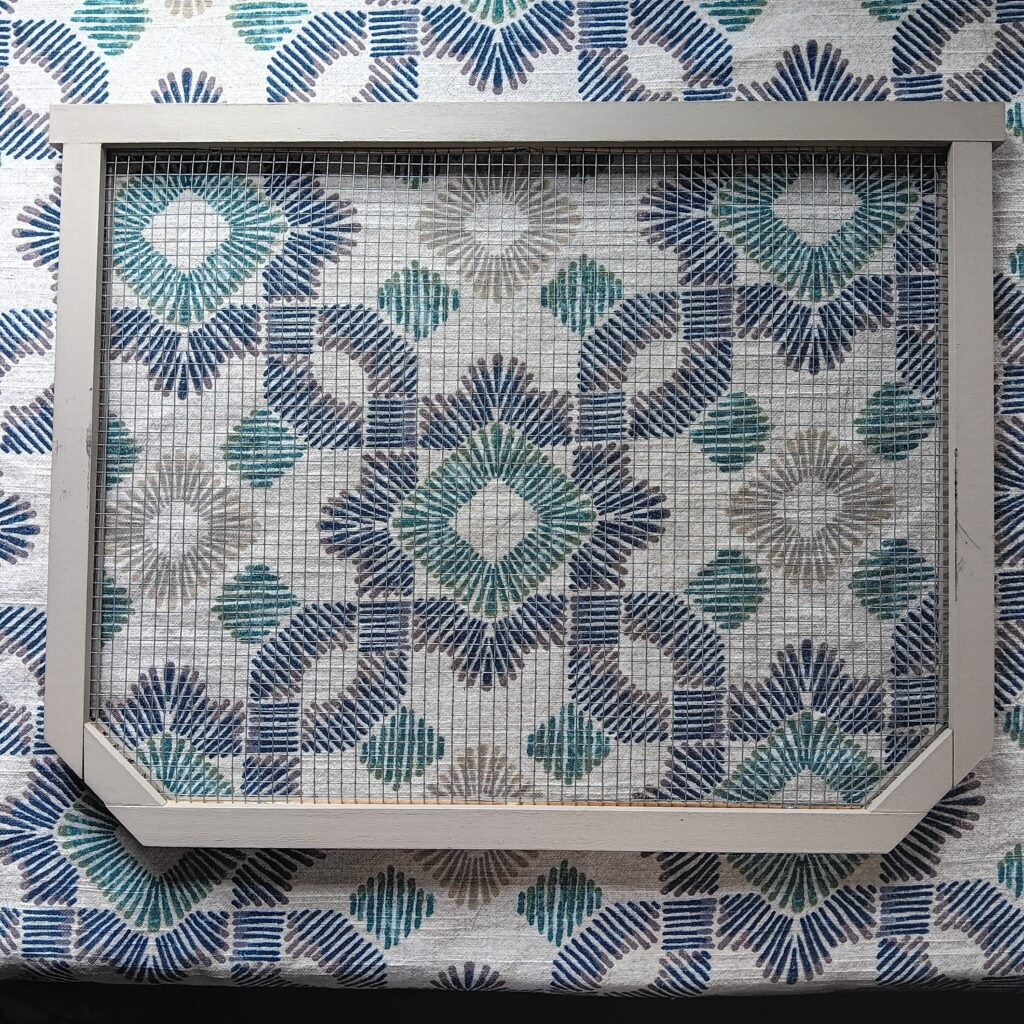
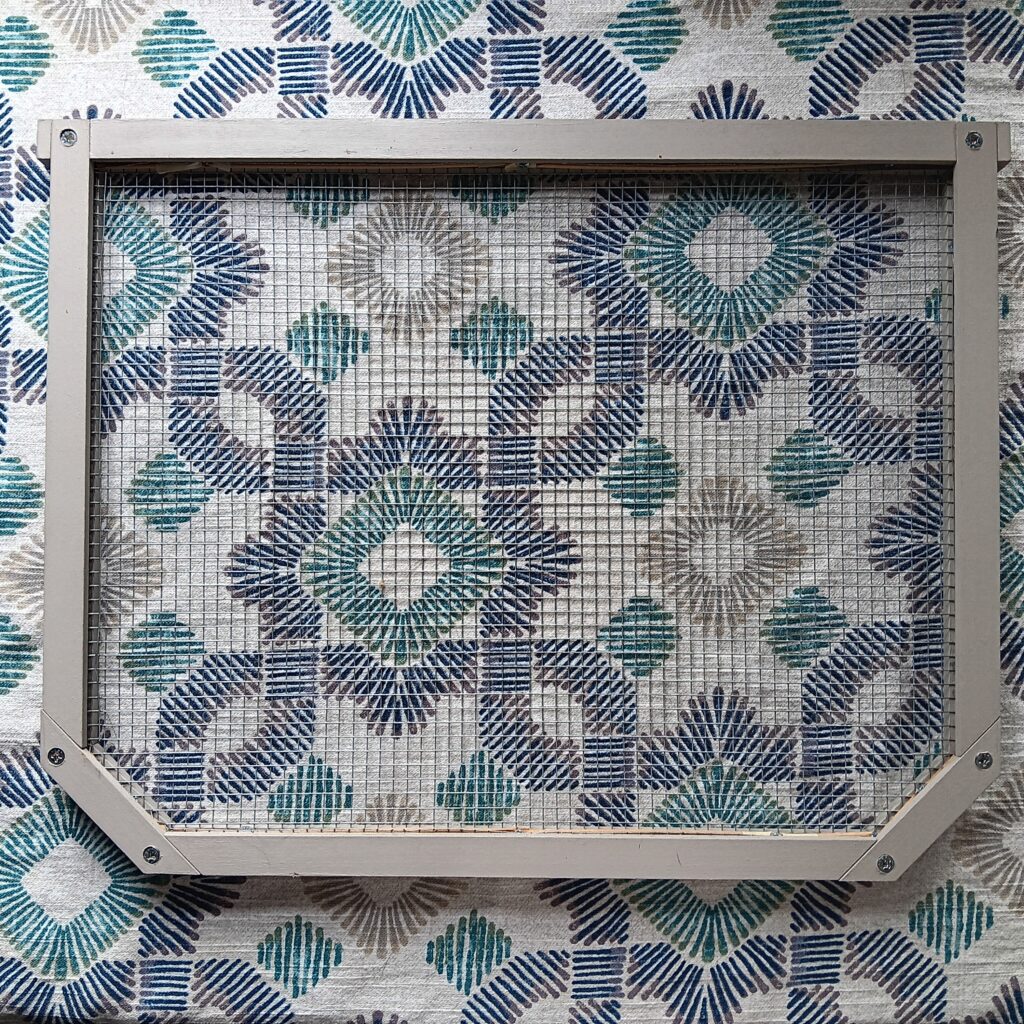
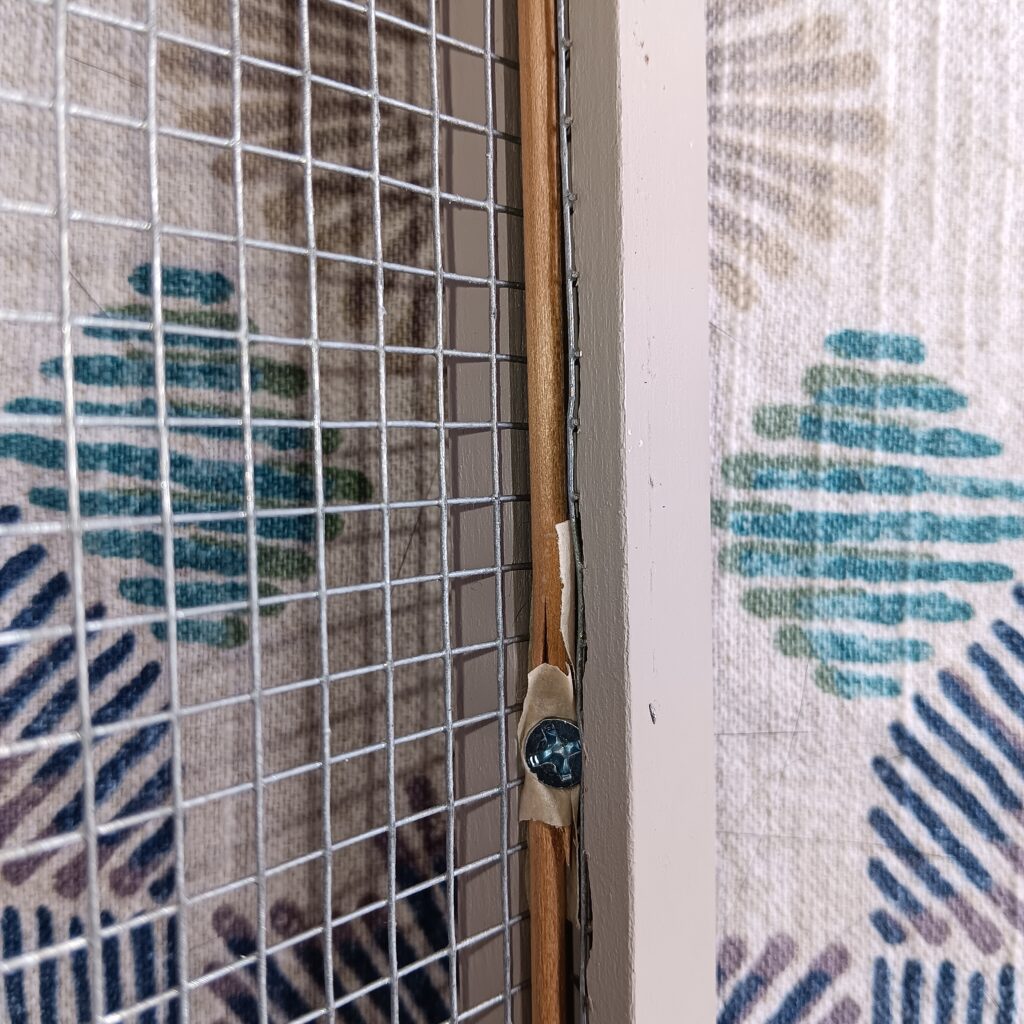
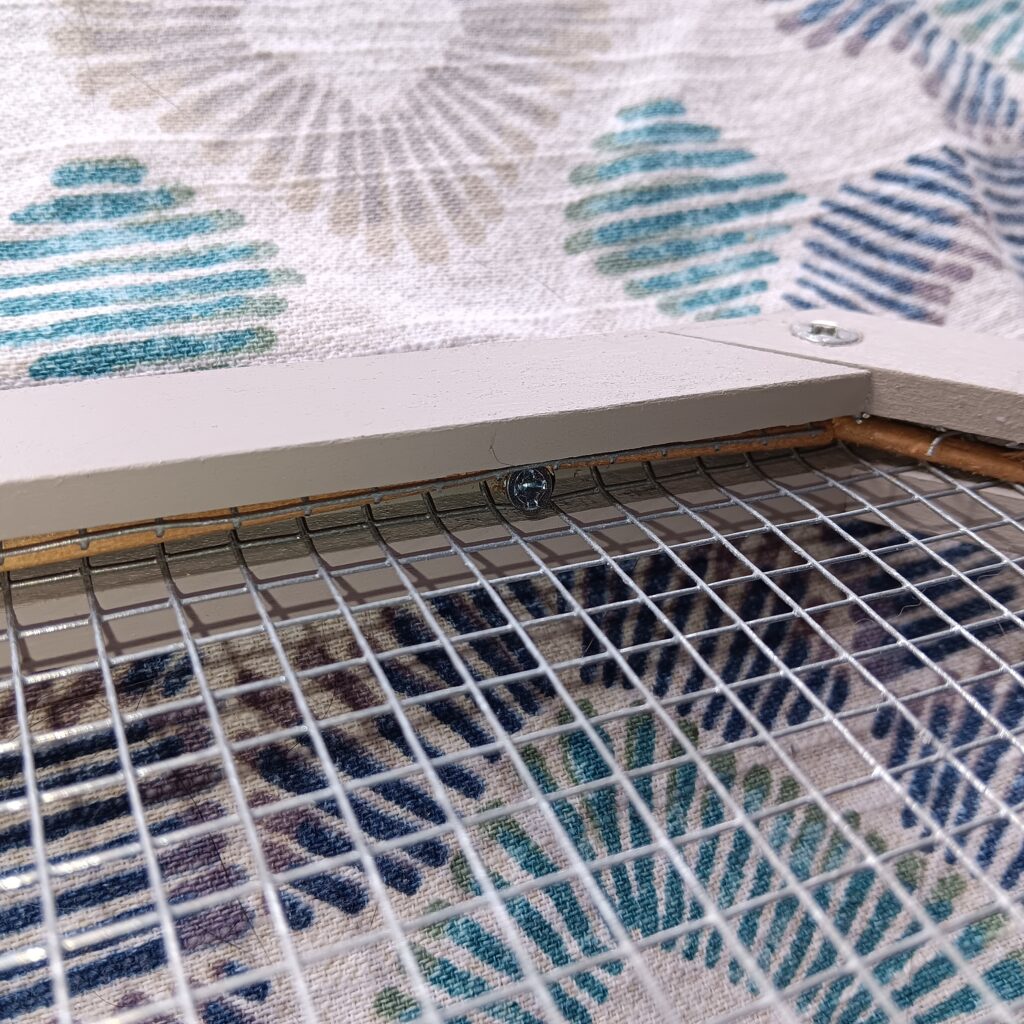
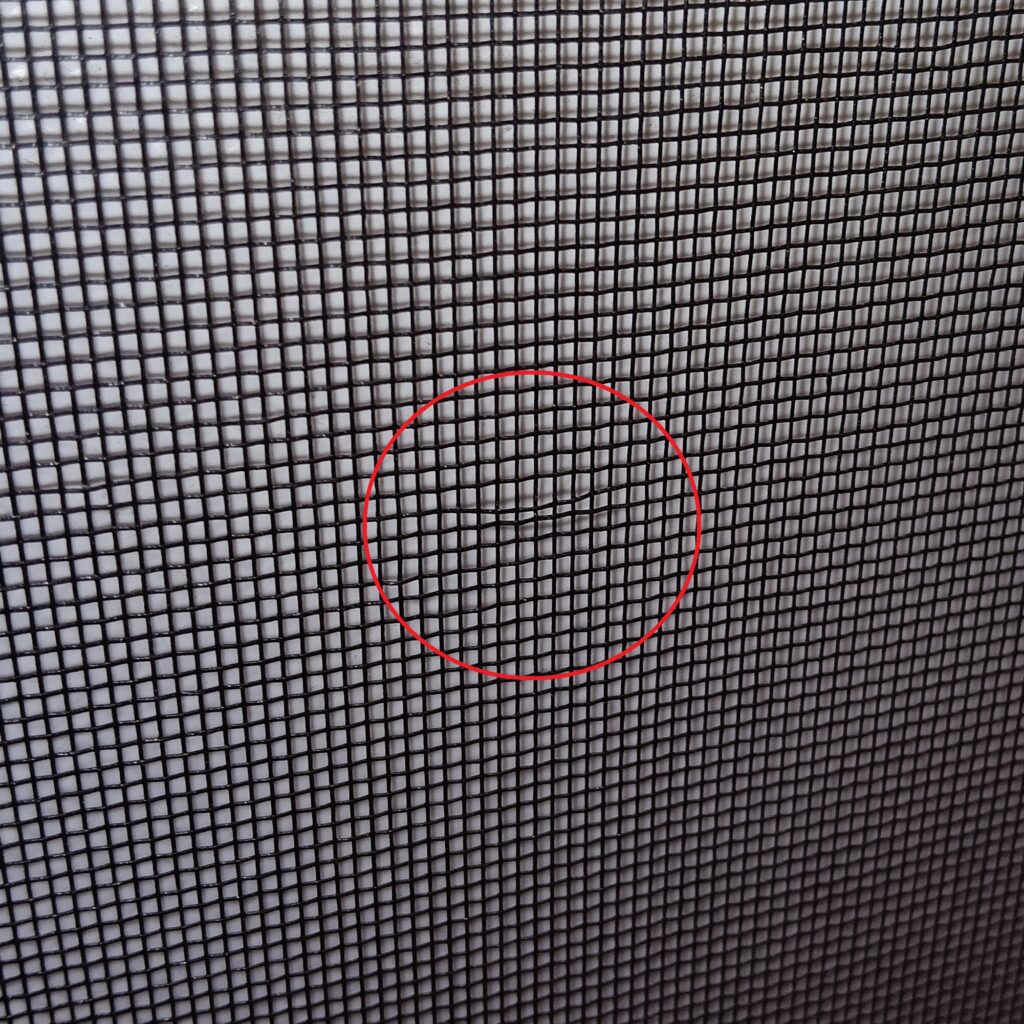
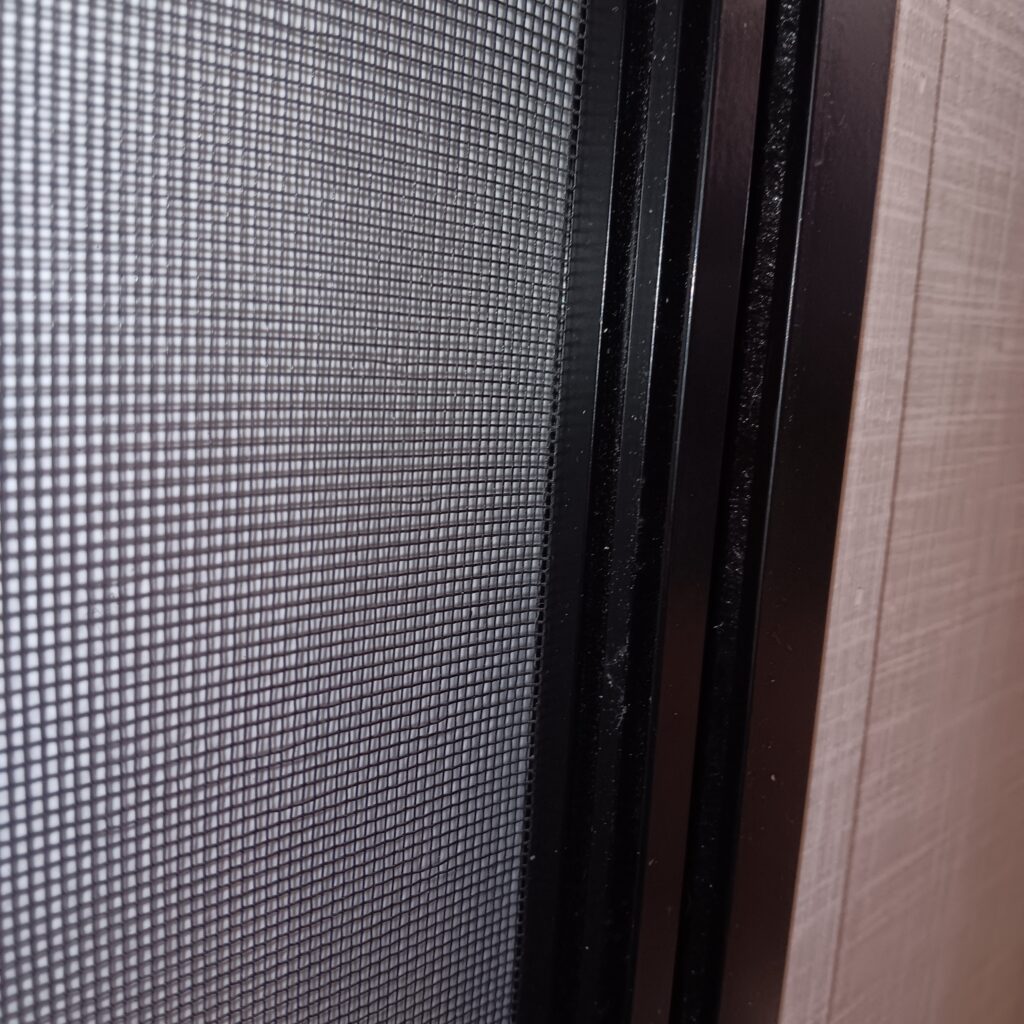
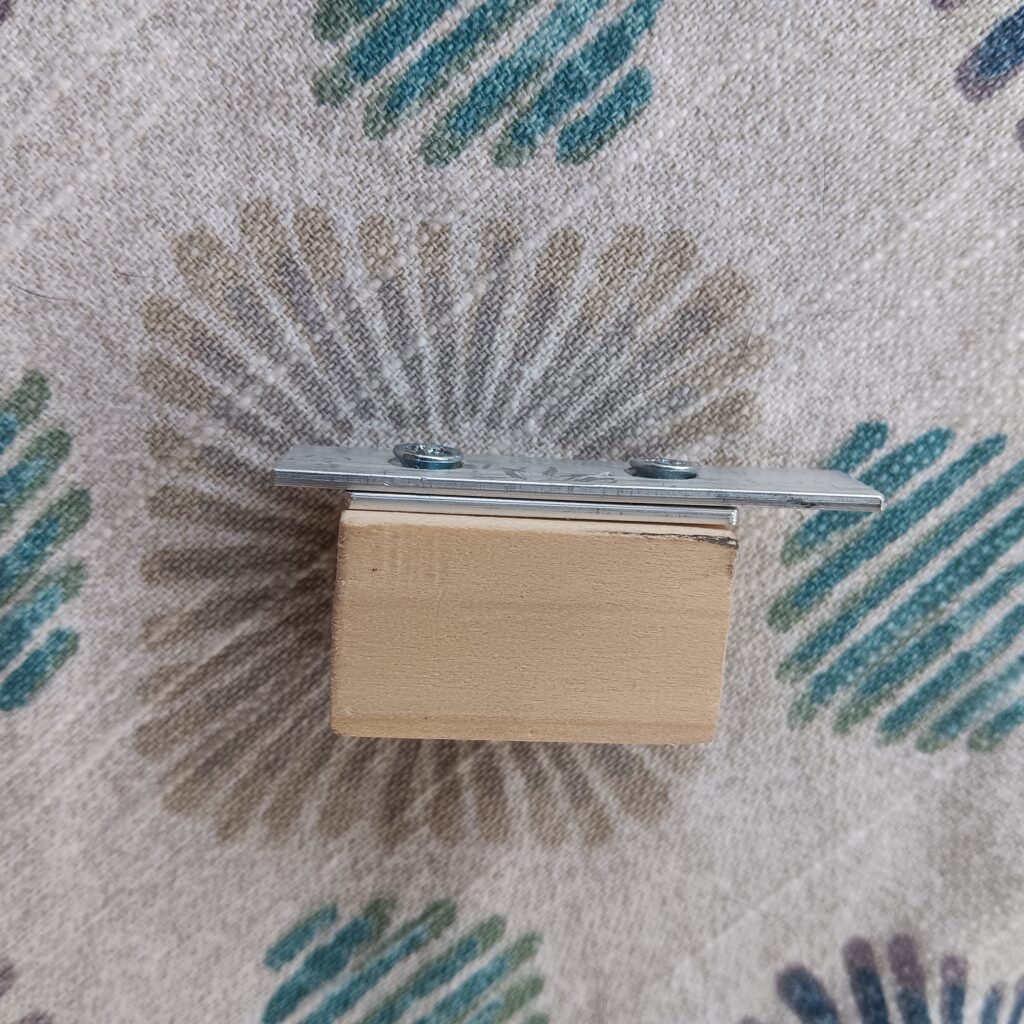
If you think windows and doors should not be a problem, you would be mistaken. Your cat can likely force their way through the screens in an RV window or door. If they are scared, they can certainly break through a house screen door. Even if your cat cannot break the screen, they might grip it with their claws and damage it over time. To resolve this issue in both of our RVs, we built a window cover using a 1″x1″ frame, 1⁄8″ dowel rods, and 1⁄4″ hardware cloth. We bent an aluminum flat stock strip to use as clips for the screen. The side valance screws keep the pet safe screen in place. To be more secure, the clip could also be screwed into the pet safe screen frame. An unfortunate side effect to this solution is that the cats occasionally grab the screen with their claws and “play the banjo” to get attention.
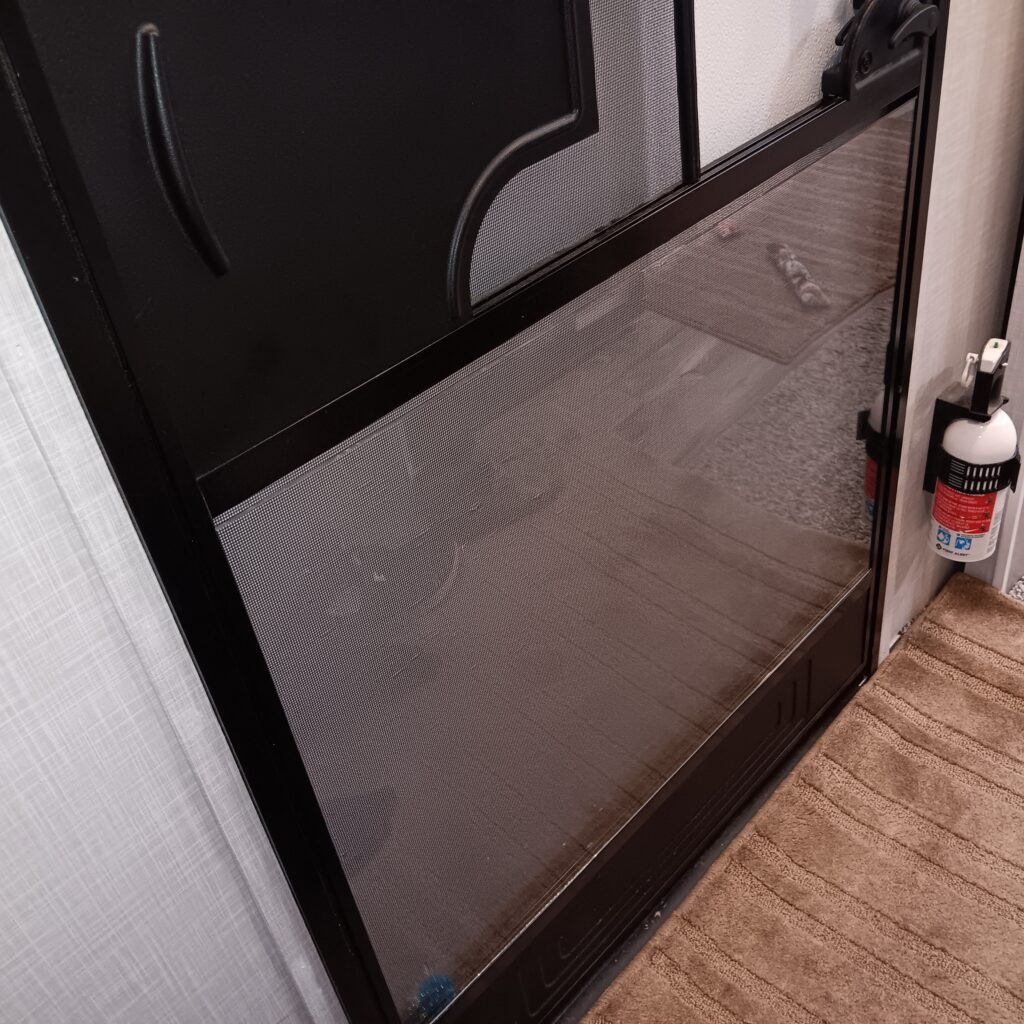
The screen door in our RV was easier to resolve, but this solution is not intended to be 100% cat proof. I would be willing to leave the windows open with the screens in them while we went for a walk. I would not take a walk and leave the trailer door open due to both trailer and cat safety. The screen door needs to be safe enough for the cats to look out, smell the outdoors, and deter clawing the screen.
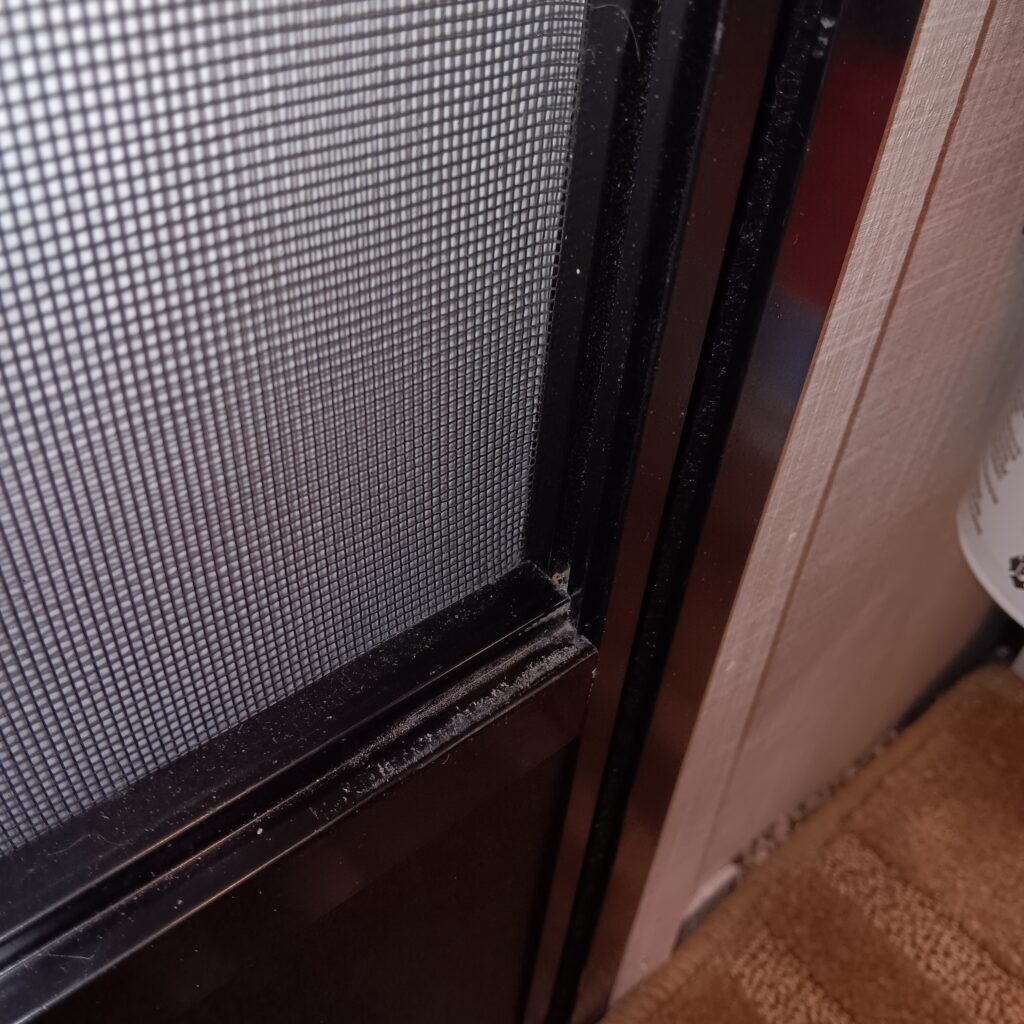
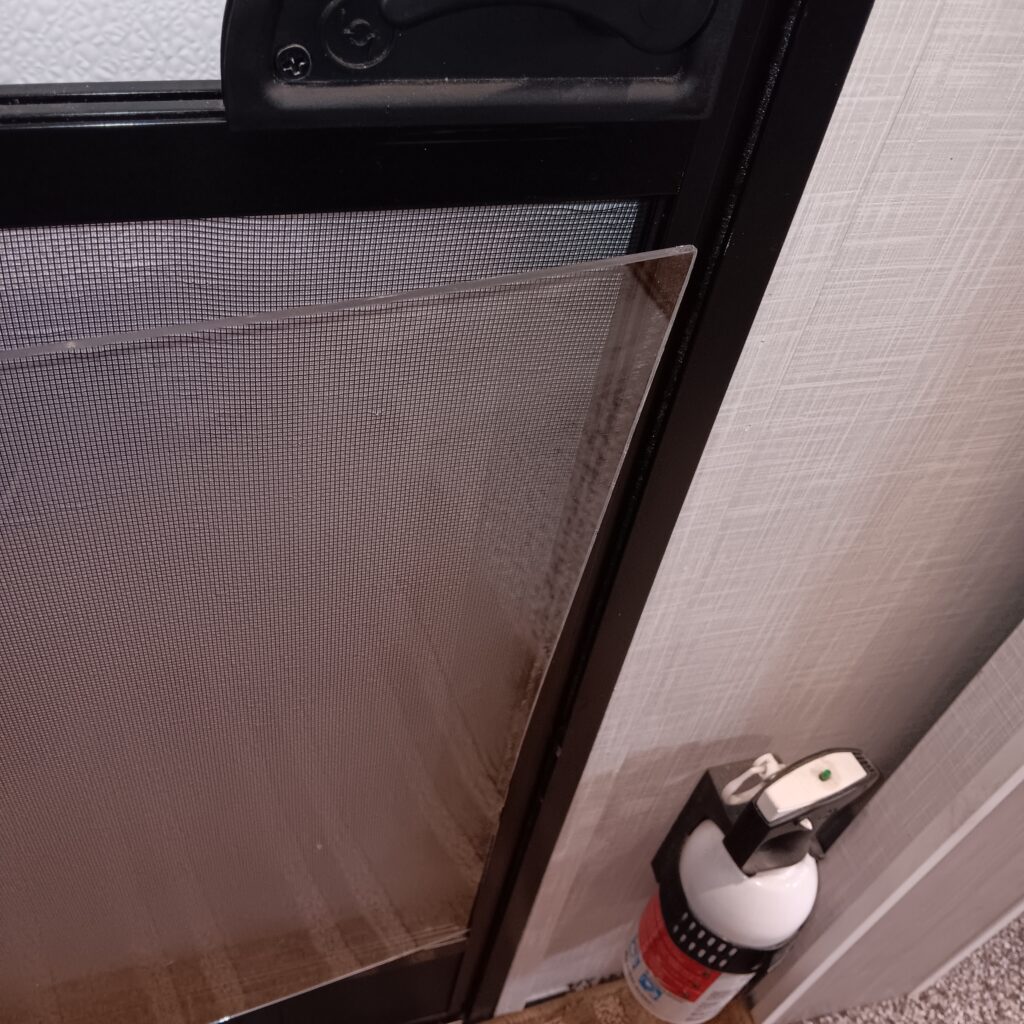
The screen door in our fifth wheel has a slot on either side on the inside. The groove is about 3⁄8″ deep and 3⁄16″ wide. There is a ledge at the bottom that meets up with the groove. This is the perfect size for a small sheet of plexiglass. We found a small sheet of 1⁄8″ plexiglass at a large hardware store chain for about $20. The vertical dimension was about 1⁄4″ short, which was good enough. After cutting the horizontal to size (5⁄16″ wider than the screen size), the plexiglas could be bent and snapped in just fine. On cooler days, the cats happily sit looking out the door. The plexiglass has remained in place for hundreds of miles of travel.
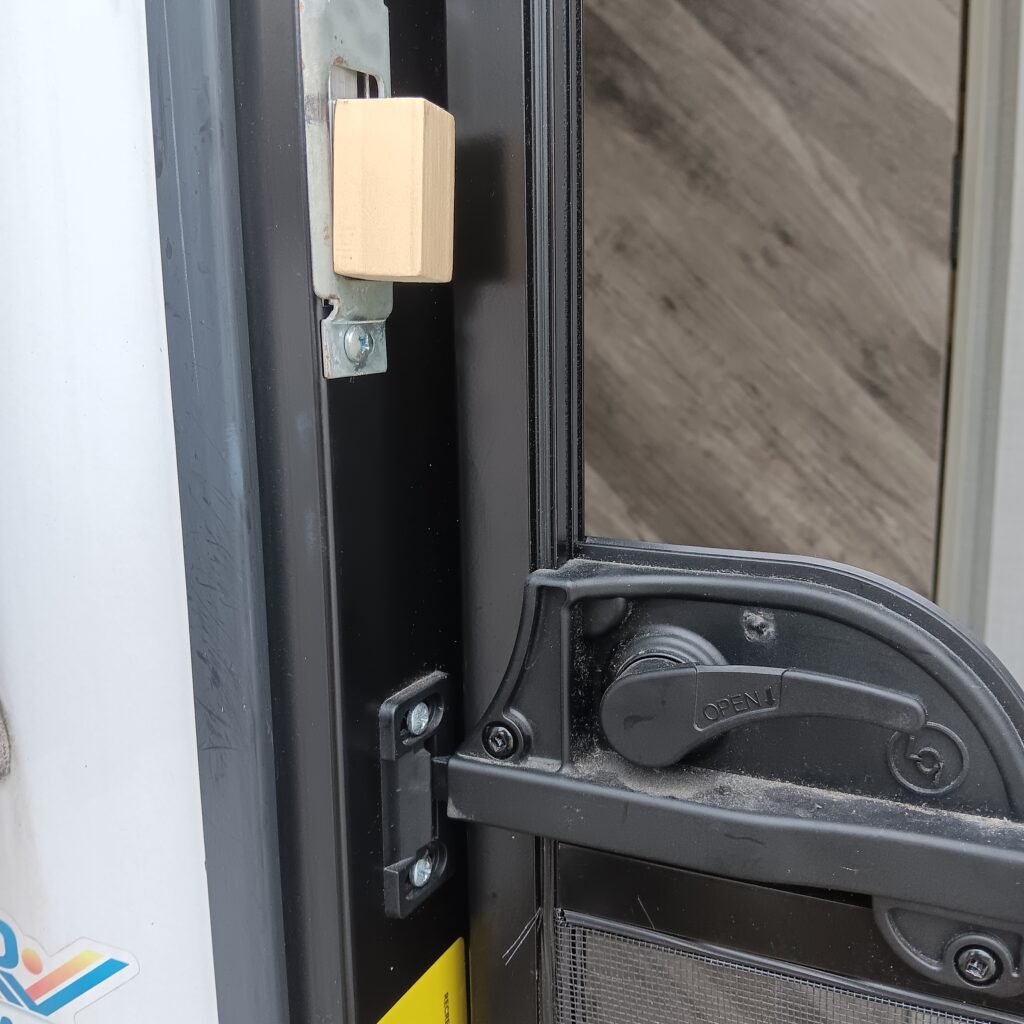
Our RV screen door has what appears to be a cheap plastic latch. It seemed stronger than a cat, but Kate was worried. Rather than do something expensive and complex, such as upgrade the screen door latch, I went with a simple block to stop the screen door from opening. The block has a flat bar on the back that lets it slip into the deadbolt slot for the main door. The long end slides in the top, the block is pressed flat, and the block slid down to catch on the bottom tab. If a cat overcomes the screen door latch, it stops on the block after a quarter of an inch. There is a sliding panel in the screen door that allows the block to be inserted into the outside latch hole from inside RV.
The two bars are cut from aluminum flat stock about 1⁄2″ x 1⁄16″ x 36″. If the screen door is close enough to the frame, something similar could be done with 1⁄2″ x 1⁄2″ x 36″ square hollow stock.
Your will need to measure your screen door latch to figure out the proper lengths. The total length of the blocker is A + B + C. The short side is C, the middle is B – C, and the long side is A + C. You might want to make the total length about 1⁄16″ shorter to make it fit in easier. Make B 1⁄16″ shorter than the measured opening. For our door latch, the total length is 2 1⁄16″. The long side is 1⁄2″, short side 1⁄4″, and middle is 1 5⁄16″.
Slides
Slides are generally more of a hazard when they are closed. Any slide that limits your access to an area of your RV is a place your cat can get into and you can not get to them without moving the slide. If you move the slide with the cat near the mechanism, the cat might get hurt or killed by the slide mechanism. In our RV search, we did not really see a case where a slide was a danger with the slide extended. Typically, something else was a danger whether the slide was extended or retracted, but the slide position might exacerbate it. The Jayco X213 with the leather curtain covering the slide mechanism is a good example of this. The hole near the slide was there whether the slide was extended or retracted, but hole was not even covered with leather when the slide was retracted.
Our current 5th wheel has the problem of inaccessible areas when the slides are closed. Specifically, when the slides are closed, you can only access the bathroom and bedroom. This is a perfectly adequate configuration for us when we want to stop over night at a rest stop, Walmart, or campground. It is a problem with the cats because they would hide in the inaccessible area when it was time to leave. Originally, I built a folding wooden wall to cover the end of the hallway. The folding wooden wall was heavy, hard to manage, and required the door open to position. A wooden wall was not a great solution. The solution that I settled on was a segmented cardboard wall. You can get pallet slip sheets from some bulk discount stores, such as Sams Club, Costco, and Price Club. If you can find large ones (4′ x 6′) in good condition, you can build a light weight wall with them.

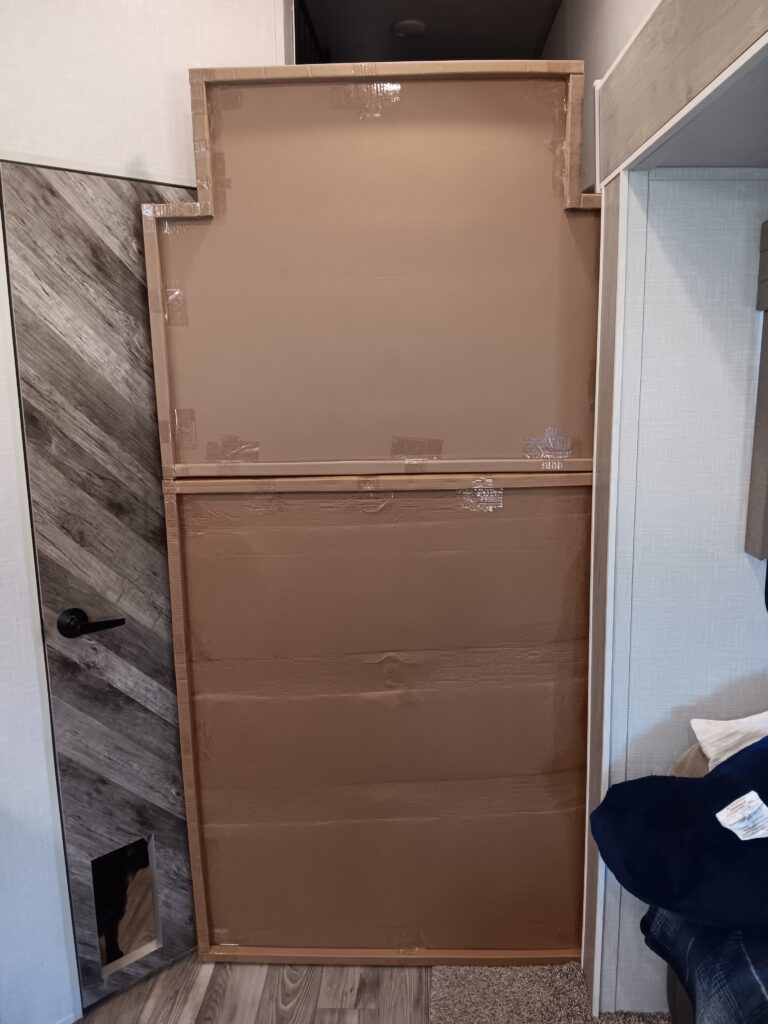

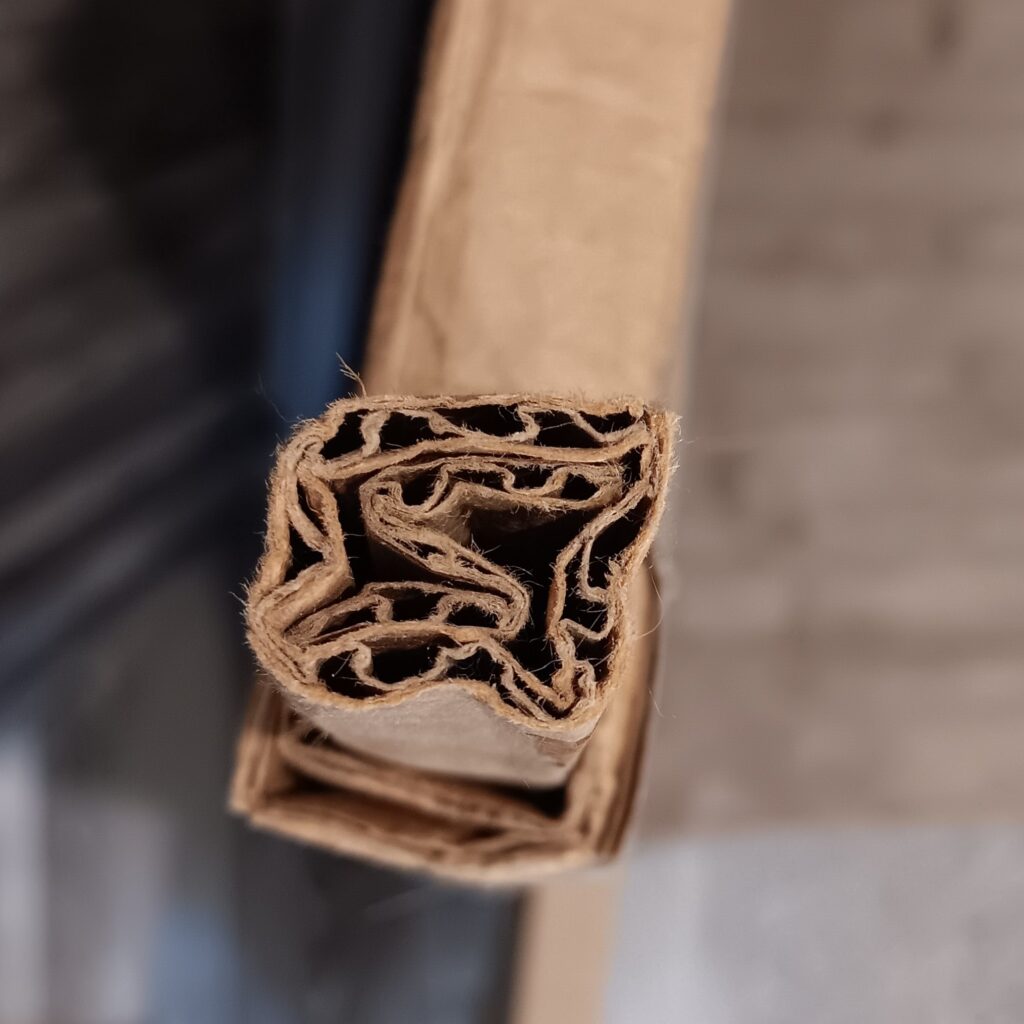


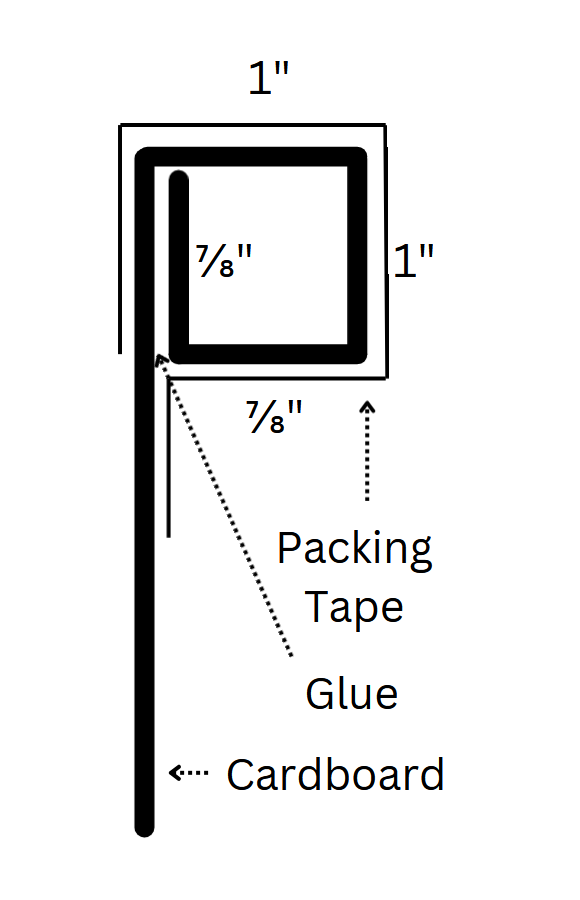
The corners are butt-joints. You have to cut the inner support an inch shorter on either side, so that it fits inside the outer support. The inner support also has a 1+” tab on the one inch wide edges of the support that fold inside the hollow and lay along the outside of the outer support. The tab that goes in the tube is glued. The tab on the outside is glued and taped. The supports are built as shown in the diagram below. I had to put a weight on the folded and glued support to keep it from unrolling while it dried.
Sometimes the slide position is just an inconvenience. Our current 5th wheel has a dresser slide that retracts with 4 inches of space under it. A cat could fit under there, but you could probably get it out by poking it with a broom. This is not ideal for the slide or the cat, so we treat it as if it was a hazard. Fortunately, we can wedge some folded towels, blankets, or unopened paper towel rolls along the bottom edge to block access underneath.
Cubby Holes
Some RVs try to use every available nook and cranny as storage or to be decorative. You need to investigate every open space to make sure that it is safe. This may require crawling on the floor or using a mirror to look under ledges or getting on a ladder to look down. Remember that cats can get into almost any space their head can fit in. Just assume that your cat can fit into nearly any hole and take care of it before it is a problem. (Your drain hole is … probably safe.)
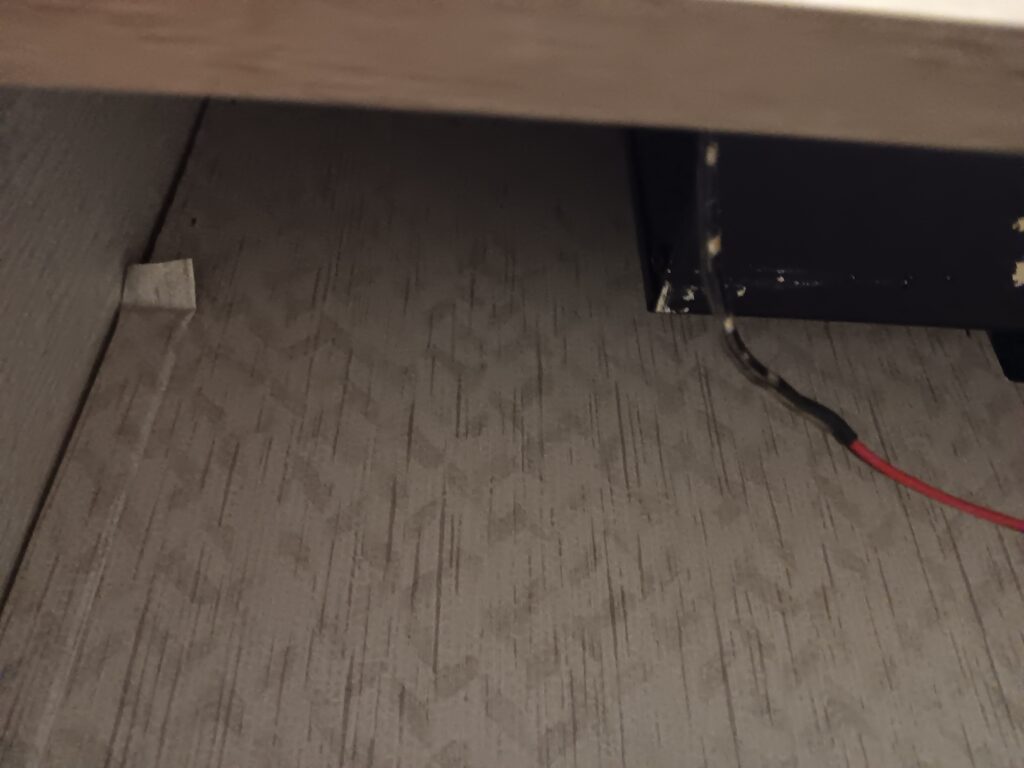
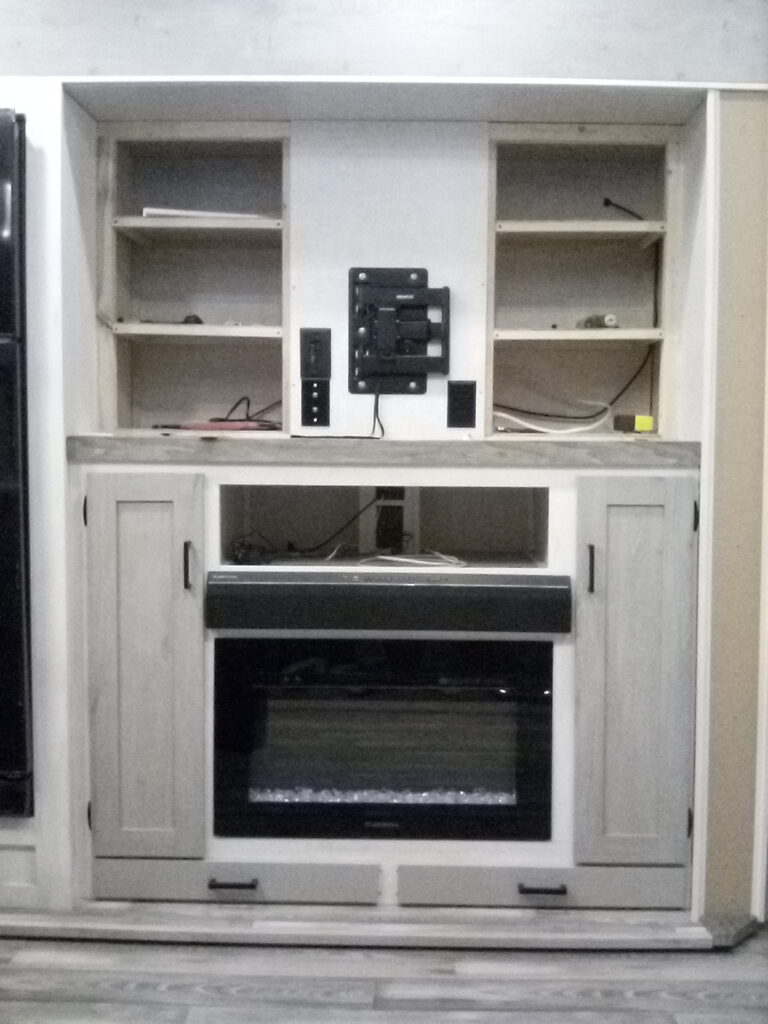
The decorative ledge and mirror finished fireplace in this destination RV looks stylish and safe, until you look under the edge. There is a 4″ x 6″ gap going up either side under the ledge. It not clear that a cat can get somewhere unsafe, but do you want to find out that hard way? The complication with this cubby hole is that you need to allow air to flow through the opening for the fire place. A solution for this might be similar to the 1⁄4″ hardware cloth for making windows safe to open. You can make a thin frame to install a heavy duty screen to close up the entire bottom edge in a way that allows air, but not cats, to flow through.
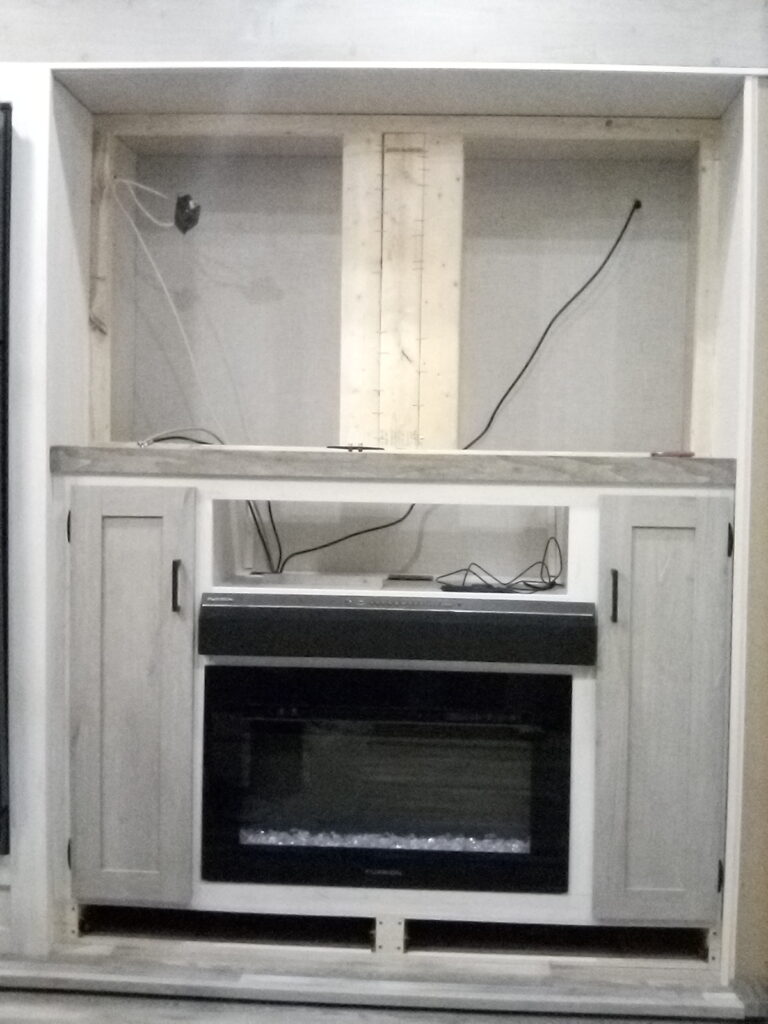
This cubby hole is for game consoles, DVD players, streaming media devices, etc. The original version on left (with the TV and upper panel removed) has several issues. The most significant issue is a large hole in the back left that might allow a cat to get into the wall behind the fireplace. If you look carefully, you see the radio antenna wire running at an angle along the back wall. The next issue is that the back 8 inches above the shelf is completely open. The cats could crawl up into the wall behind the TV or over into the lower cabinets on the left and right. The corrected version in the middle has enclosed the top across the back, added a conduit in the middle for the antenna and electrical wires, and added shelves behind the TV. This version is better looking, structurally stronger, more functional, and cat safe. The cost of the change is that it is about 25 pounds heavier. The picture on the right is MacKie in the cubby with no way to get anywhere unsafe.
Long Jumps
Look for long and unsafe jumps in the RV. These are harder to describe and define because they depend on how athletic and risk adverse your cats are. When he was young, MacKie was the worst of both of those. He was very athletic, and he was not very risk adverse. At one point, we put up a six foot tall gate in our house to separate MacKie and Tinkerbell. It had a bar in the middle, and he climbed over it. In addition to springing from the floor to the middle bar to the top, he had to drop six feet off the far side. He was a good candidate for trying to do the most dangerous thing in any new environment.
If you have a loft, think about whether your cats can jump from the loft to the upper slide ledge or a chandelier? Our current RV has slide ledges wide enough for a cat, but the ledges are not conveniently close to the loft railings. A loft with access to places the cat should not go can be fixed by blocking the access in or out of the loft.
- If the loft has a railing,
- drilling holes in a sheet of Plexiglas to secure it to the railing makes it safe, but it allows the cats to look out.
- weaving a cardboard sheet through the railings blocks access cheaply.
- keeping supplies (e.g., bulk paper towels, toilet paper, etc) to block the access and view at the dangerous location is basically free.
- If the loft does not have a railing, you may need to build something. Be as certain as you can be that what you screw the wall into is safe to screw into (i.e., no water or electrical lines) and strong enough to hold (i.e., a stud instead of 1⁄8″ plywood).
- Using Plexiglas to would give the cats a view out of the loft.
- A lightweight sliding pocket door could be used to prevent access into the loft.
Our x213 travel trailer had a bunk about five feet up, and the kitchen counter was about four feet away. When MacKie was younger, he would leap across the distance to get to the bunk. Tinkerbell just taught herself to climb the ladder. She was the smart cat in the family.
The counter to bunk jump could not be easily fixed. If we put a wall up on the counter, we could not use a necessary part of the kitchen counter. If we put a wall up on the bunk, we could not use the bunk, There was no wall that was safe for cat ledges. We added a ladder for getting into the bunk. There was a privacy curtain on the bunk that we kept closed most of the time. Some times, the curtain even stopped MacKie from trying the jump. He never appeared to seriously hurt himself, but he scared us a few times. Eventually, MacKie learned to climb the ladder by watching Tinkerbell, and we breathed a sigh of relief. If it is not possible to make the jump safe, you need to answer some questions.
- Are your cats too lazy to try the jump?
- Are your cats agile and strong enough to make the jump?
- Do you just need a different RV?
Wrap Up
There are a few things to consider when modifying your RV.
- Will your changes void the warranty? Can you make your RV cat safe without any warranty-voiding modifications?
- Is it safe to screw into that wall? There can be plumbing, venting, and wiring behind a wall. Many walls have little to no structural support in the middle – just watch the wall bow in and out when you use an electrical outlet.
- You absolutely must account for the weight of your changes in the cargo carrying capacity of your RV. If you make 500 pounds of cat safety modifications, your RV cargo capacity is 500 pounds less. Making the lightest weight changes that you can afford will be important in some RVs. You should also attempt to balance the weight with any changes.
It takes at least a little (and sometimes a lot) of time, planning, and work to make an RV cat safe, but it can be done. Once your RV is cat safe, your fuzzy buddies can camp or travel with you. You should consider whether this is a good idea before modifying your RV. Our cats are very social with us, but they do not much like car rides. One of them gets car sick on about one third of the trips. This is not too traumatic because we bought the RV to allow us to camp a longer duration with the cats. We generally stay at least a week or two at each stop. Occasionally, we travel at a faster pace, but we almost always leave one or two full days between travel to give the cats a break. This is especially important as they get older.
The cats appear to have gotten more used to travel because they mostly sleep on the drive. They also acclimate very quickly at each stop. They even acclimate quickly in cases where we have to stay in temporary lodging. It likely helps that we bring in some of their cat beds, blankets, and toys to any temporary lodging. They used to take three days to acclimate on arrival to a camp ground; currently, it is closer to one day.
In addition to making your RV cat safe, you should look for an RV that is cat friendly and modify it to be more so. Lots of accessible windows is a good starting point.
