
The Problem
Cats like to be where they want to be. This can be a bit annoying when you want to go into a room and shut the door. They might scratch at the door, rattle the door, or meow at the door. To prevent this problem, we decided to install pet doors where needed.
The office, bedroom, and closet were modified with pet doors, and the bathroom and pantry were left as is. The office and bedroom pet doors could be closed with a sliding barn door, but the closet (with the cat little) was left without a door.
You can buy an installable pet door for $15 to $200, depending on how durable and featured you want it. A lot of the labor will be the same, and it will not match the RV door. There is nothing wrong with this solution, but I could do it for just labor and match the door perfectly. It was also an interesting problem to solve.
Start With A Test Door
The first problem was to figure out if this was possible, so I bought a cheap $50 interior door of the same approximate width from a hardware store. I checked the door with the appropriate RV door frame. The width was correct, but the height was too large.
- I measured from the top of the test door to the height of the original RV door. (i.e., mark the bottom off the test door to match heights)
- I put painters/masking tape centered along the height line of all four sides to reduce splintering.
- I used a T square to draw a line across the test door at the height line
- I clamped a cutting guide onto the test door so that a circular saw blade would cut on the bottom side of the door just under the height line (use scrap wood to prevent marring the door with the clamps.)
- I cut off the bottom of the door using a high tooth count paneling blade to reduce splintering.
- I peeled the tape off from the top of the door side to bottom side to prevent the tape from pulling off too many splinters. (i.e., peal from the door interior side of the tape instead of the door edge side of the tape.)
Our RV has shorter doors than a house, and the cheap test door was hollow. The consequence of this is that the entire bottom frame board was cut off of the test door. Below, you can see below the basic construction of a hollow door.
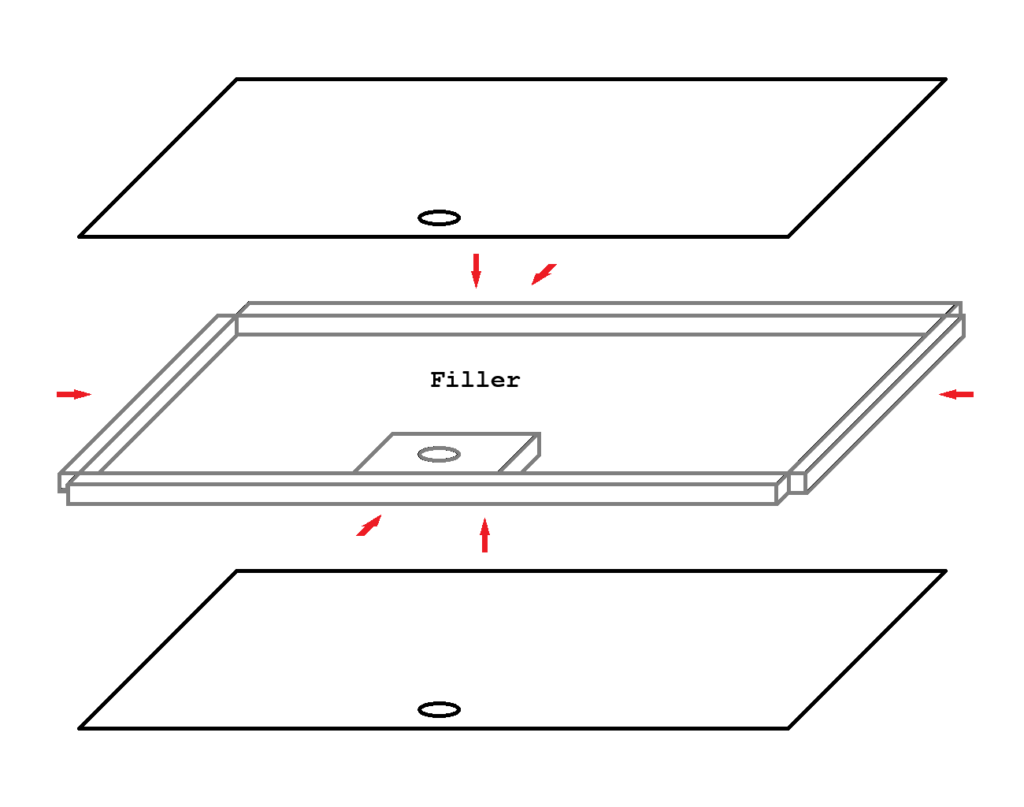
Hollow doors have approximately 1.5″ of wooden frame around the outer sides, a door handle reinforcement board, a panel on the front and back, and filler. They are designed to be adjusted a small amount for carpet, but not several inches to resize them for a smaller door frame. To prevent the test door from being too weak, I had to replace the bottom frame piece. Some videos refer to this as “corking” the door.
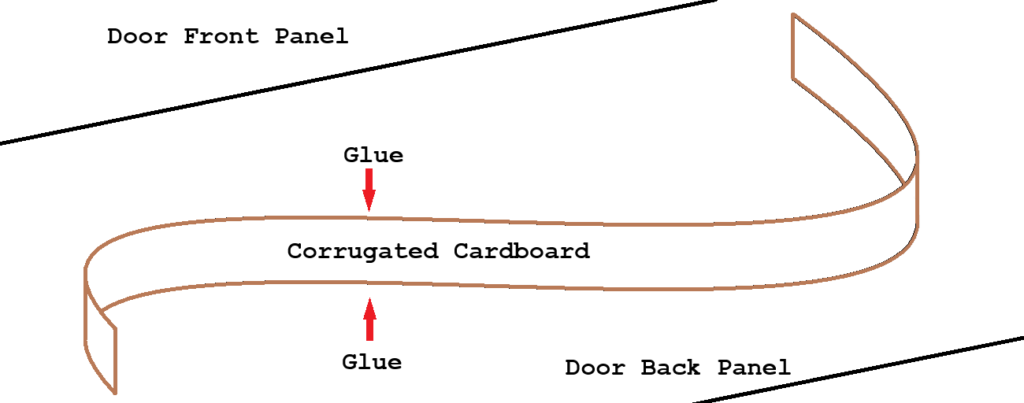
The filler in the hollow doors varies by manufacturer and, probably, by decade. The filler in this door was 1.25 inch wide cardboard strips on their side curved in random arcs and swirls glued to each other and the front and back door panels. A single filler segment might look a little like this.
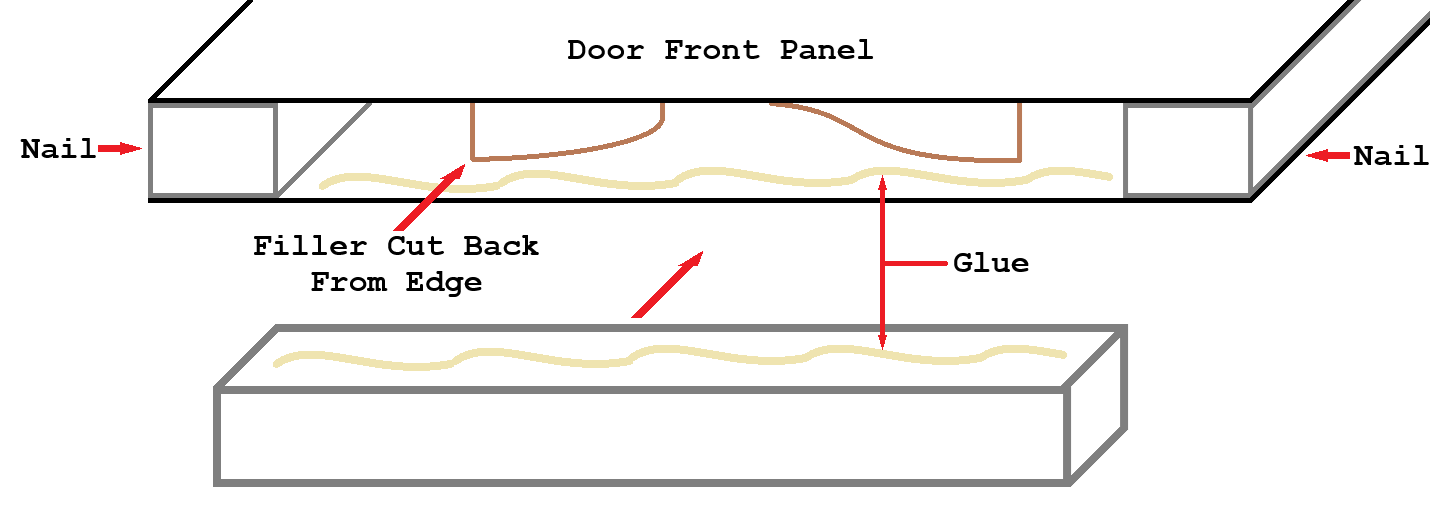
When you cut the end of the door off, it leaves ends of cardboard filler at the opening on the bottom of the door. These have to be cut back and the glue trimmed flat on the inside edge of the opening on the bottom of the door. Once the hole is prepped, a board can be fitted in, glued, nailed from the jam and latch sides of the door, and clamped.
The steps above were only required because I did not want to ruin the existing RV door with nothing to replace it. If the pet door worked on the test door, then I could safely try it on an RV door because I had the test door as a replacement.
The process for creating the pet door hole is essentially identically to “corking” the bottom edge, but you do it in a hole you cut in the middle of the door.
Building The Hole
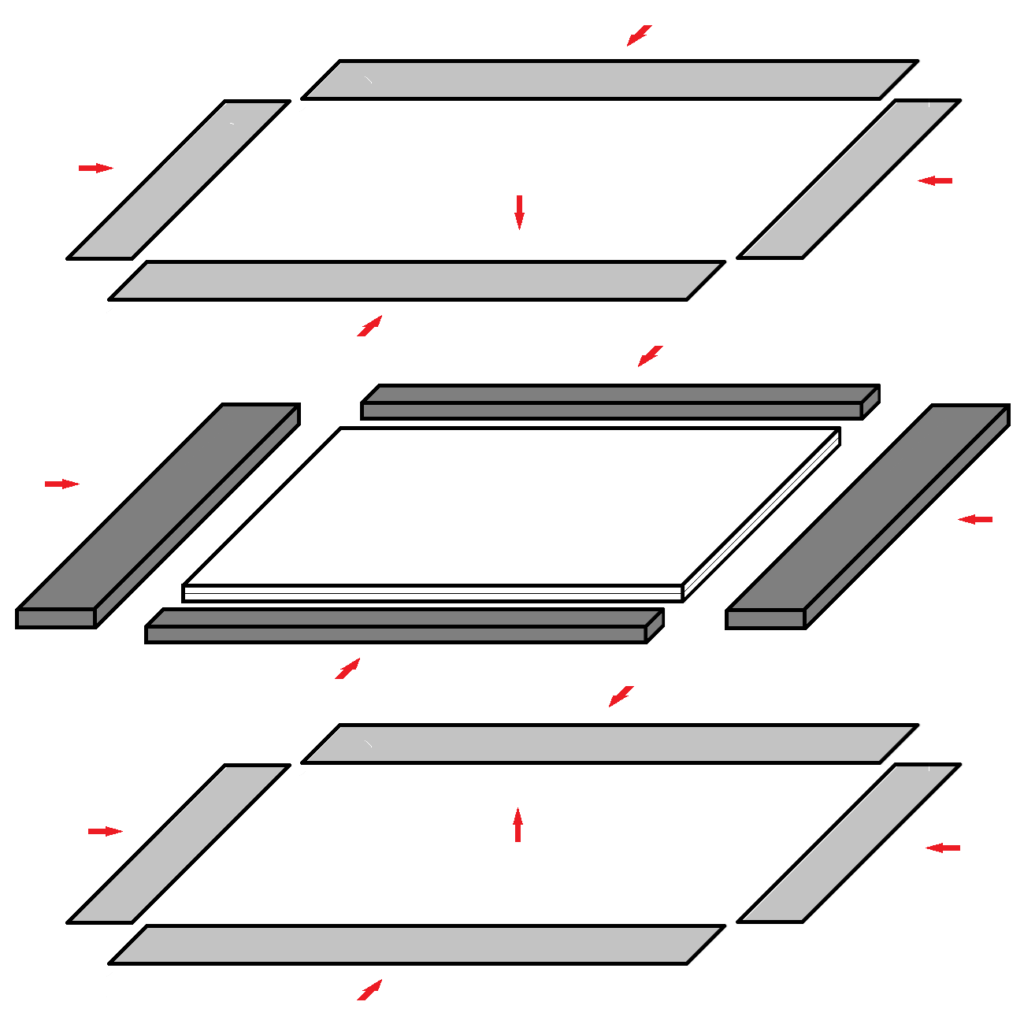
The frame and filler is omitted from the image, but an exploded view of the end result should look a little like this.
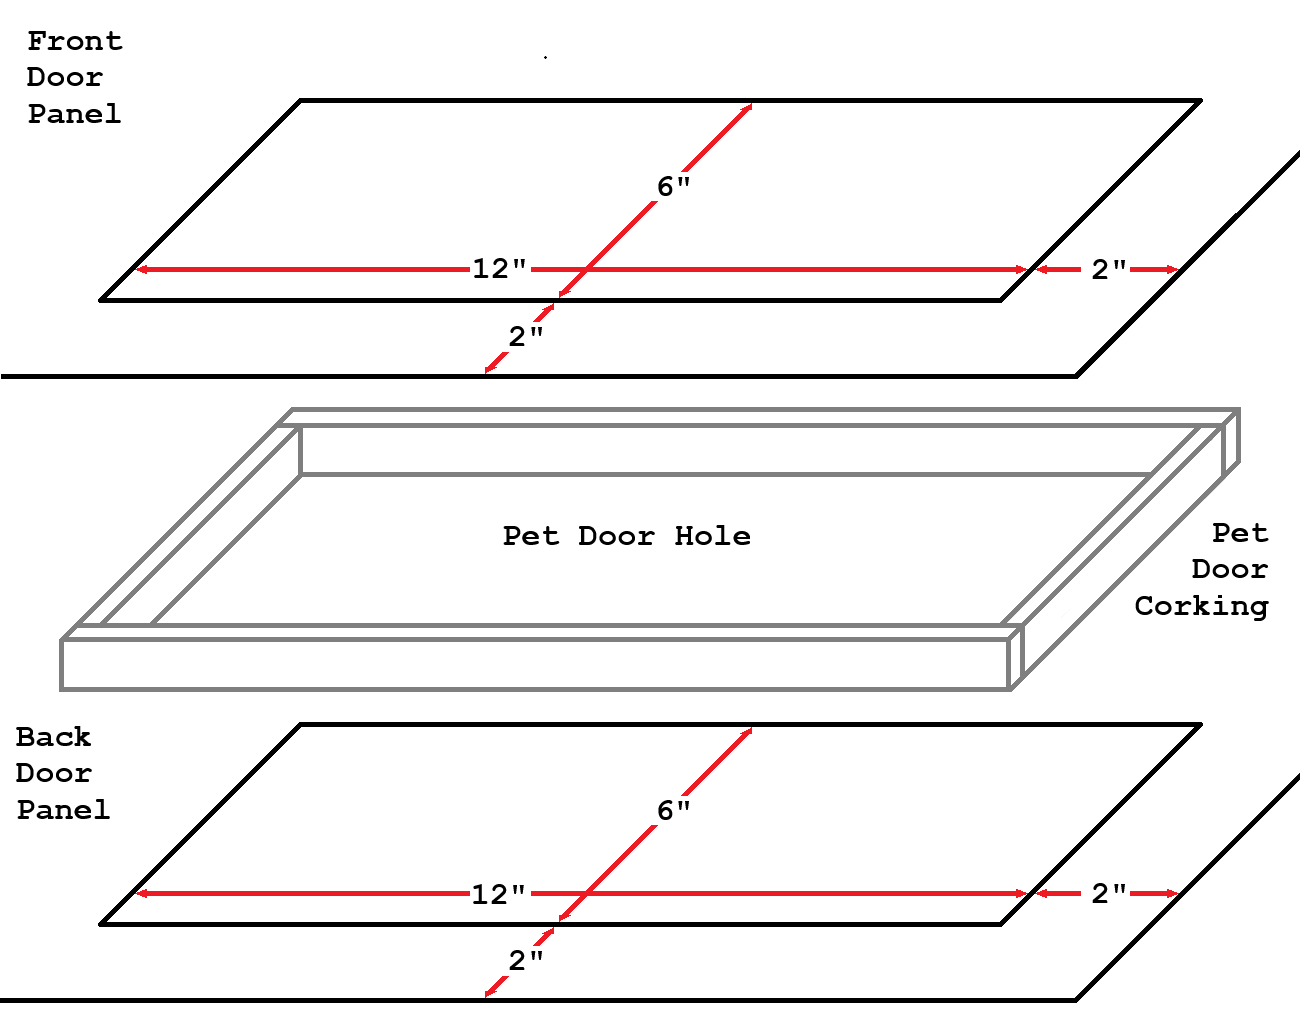
I went with a 6″ x 12″ hole because it was large enough for our cats to get through without an issue, and it was small enough to not compromise the integrity of the door. It is offset from the edge by 2″ for both aesthetic reasons and to get far enough away from the frame to be able to cork the edge. If you preferred, you could try to cut the hole to meet up with the frame on the outer edges, so you only have to cork the upper and inside edge. The frame would be the cork on the lower and outer edges. Without knowing the frame dimensions, it might be difficult to get a clean full-sized cut-out to use as a door.
Unless you have a VERY chunky pet, the door corking should not need to be super thick. I used 3/4″, and it has held up fine for several years. Anything from 1/2″ to 1″ thick should be fine. You will need to measure your door to determine the other short dimension. For my door, I ended up using 3/4″ x 1-3/16″ corks.
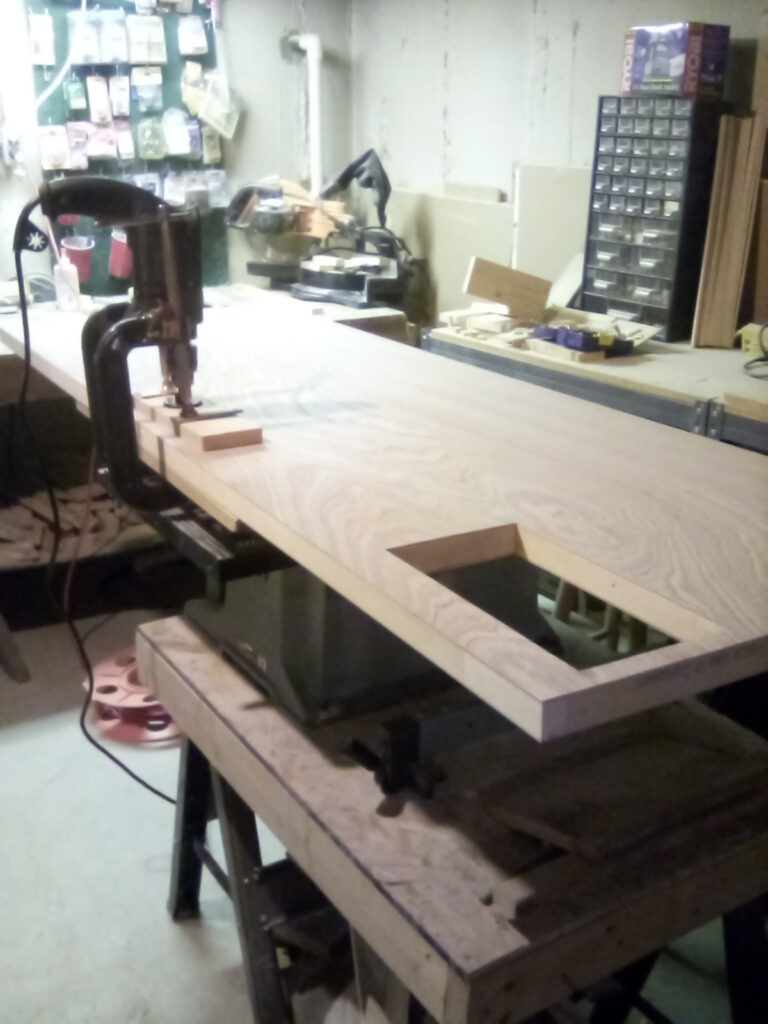
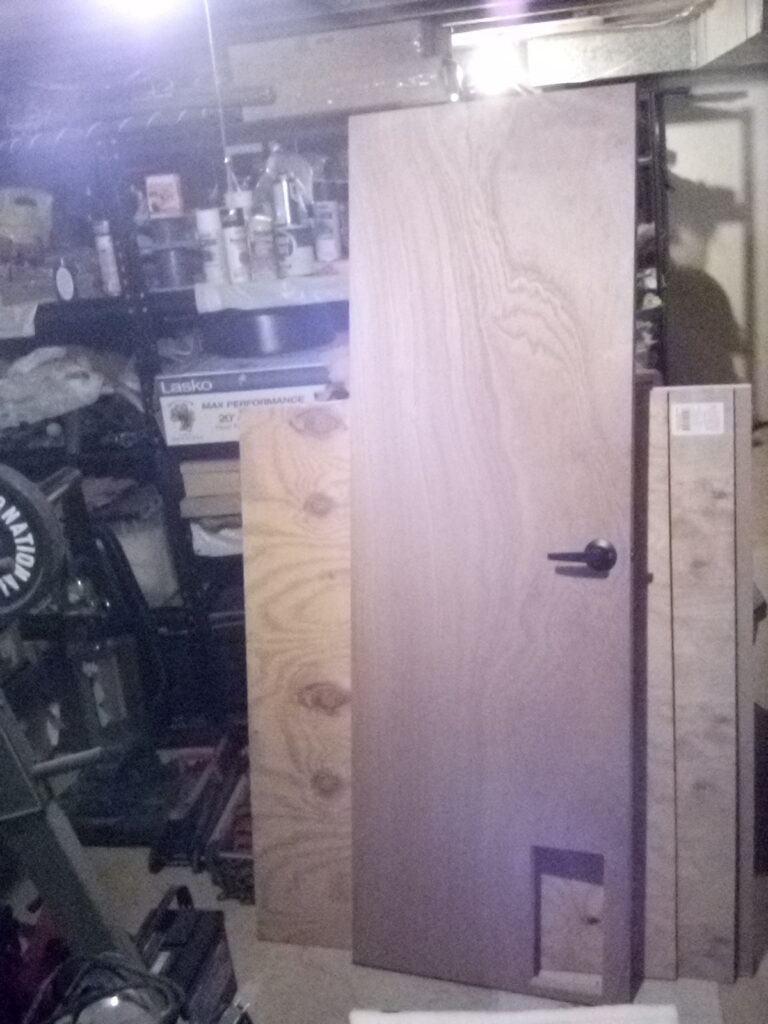
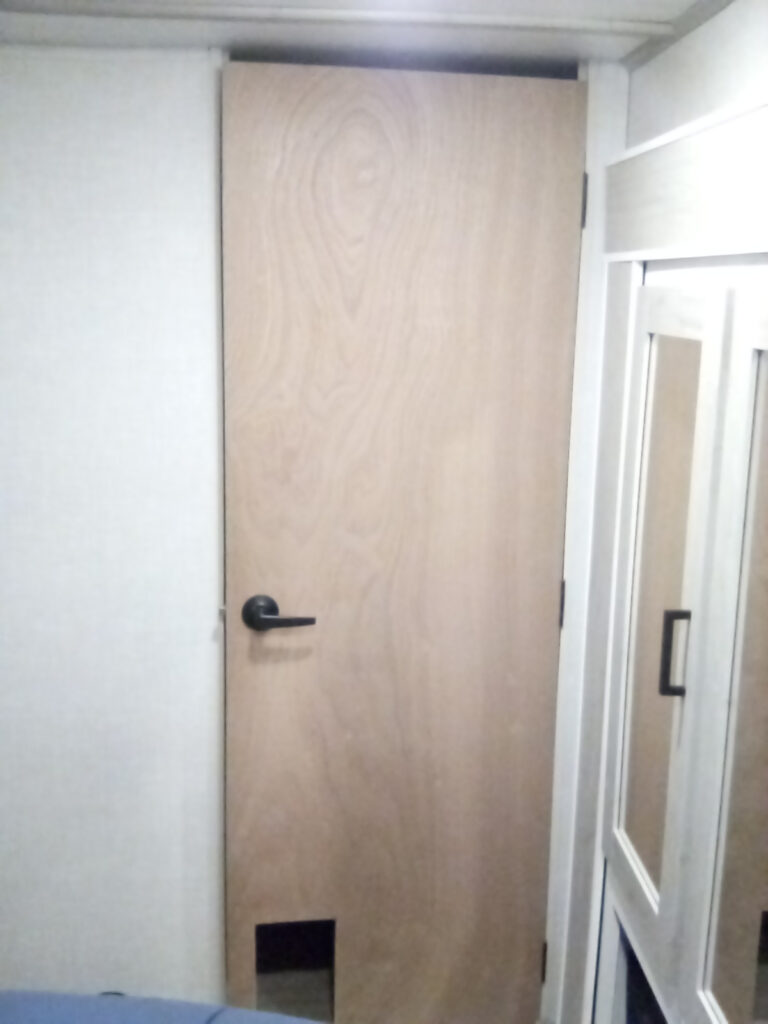
This is how the test door turned out. The picture quality is terrible because it was taken with a $100 flip phone. The first picture is drilling the hole for the door knob because the $55 door comes with no hole. The last picture is the door temporarily installed int the RV closet. The door was just a test; it was not painted left in place. I think it is still in storage somewhere.
Making The Pet Door Door
I decided that we needed to be able to close the pet door for the office and bedroom. This way we could lock the cats in or out of the office or bedroom while working or packing for moving day. The closet door with the litter pan seemed wise to leave permanently open.
I considered several options, such as cabinet hinges. I had two concerns with hinges. First, if the pet door is open, it can interfere with the main door functionality. Second, the door would need some kind of latching mechanism for the open and closed position. A better option was something more like a pocket door or sliding barn door which would be low profile. The pet doors are very light, so rather than bearings or wheels, the door could just slide. A pocket door would have been interesting to construct, but the doors in RVs are a bit too flimsy.
The door panel is about 1/8″ MDF with a wood grain sticker on it. Aligning the panel cut-outs and gluing them back to back results in a 1/4″ thick pet door panel. In order to slide freely, the rail needs to be at least 1/16″ of an inch wider (i.e., 5/16+” thick). As it turns out, 1/2″ aluminum U-channel has 1/16″ walls, so the inside gap is 3/8″ wide. It is cheap-ish, light weight, easy to cut, and easy to bend, so it is ideal for this use. (Fun fact: if you turn U-channel on its side, it becomes C-channel!)
With the door panel cut-outs glued together, they have an ugly edge, so an edge board was added – 1/4″ thick by 5/8″ on the sides and 1/4″ x 1″ on the top and bottom. This has an added advantage of making the pet door slightly larger than the hole. Leftover RV 1″ wide trim was glued over the joints on either side. The U-channel is 7/16″ deep, so the trim is offset about 1/2″ from the top and bottom. After adding the edge and trim to the 6″ x 12″ door panel, the pet door cover ended up being about 7 1/2″ x 14 1/4″. Yes, the math does not work out quite right. I think this happened for two reasons. One, the MDF does not cut with clean edges, it ends up with almost a fuzzy edge. Two, the edge boards did not have to be any exact width, so the cuts may not have been exact.
The rail just needs to be cut to length, edges bent in to make a stop, and a mounting hole drilled. You only need holes at either end because the door has no structure to mount to in the middle. This also prevents a screw head from interrupting the slide of the door. The easiest way to make the stops is to grind 1/2″ off the outer corner off and fold the single outer edge so that it touches the opposite side of the U-channel. The mounting hole is drilled in the opposite side of the U-channel outside the folded edge. One rail opening faces up and one faces down. Which edge is the outer will differ for the top and bottom rail.
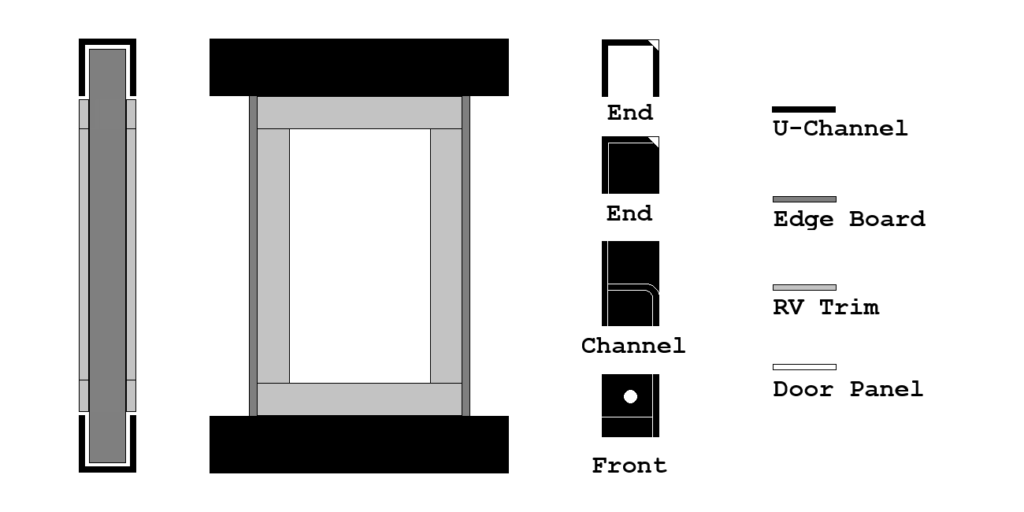
You will need to measure your final door to determine distance the rails should be above and below the door hole edges. The lower rail is screwed in about 1/2″ of an inch below the hole bottom edge. Make sure that the rail is level with the door and hole. The door is inserted, and the top rail screwed in 1/2″ above the hole top edge. This should give about 1/8″ or less of vertical play in the door.
The End Result
I turned out very lucky in that the RV doors were made almost exactly the same as the test door. The only difference was that the front and back panels were not wood with veneer; they were either 1/8″ MDF or compressed cardboard. (There is not much difference in the two.) I also had some extra RV trim from other modifications. The hole corking and door edging were just spare wood from other projects. The most expensive part was the paint and two aluminum C-channels for the door guides. We already needed the paint for other modifications, so it was essentially “free”. The labor was billed at $0.00 per hour, so I could afford it.
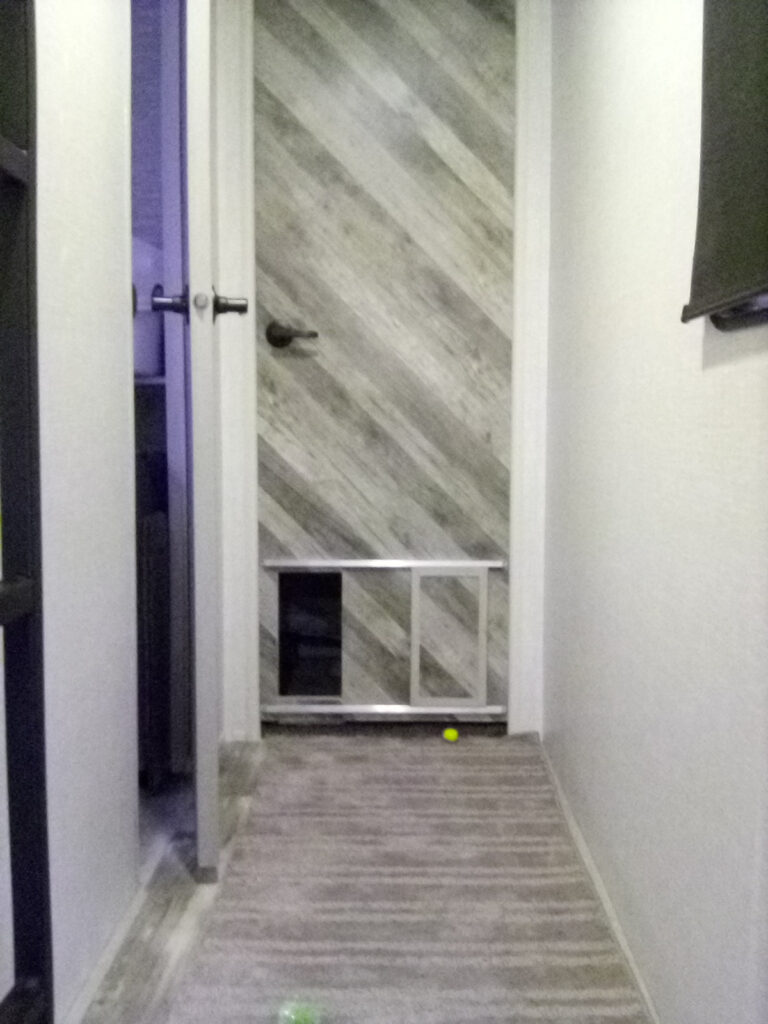
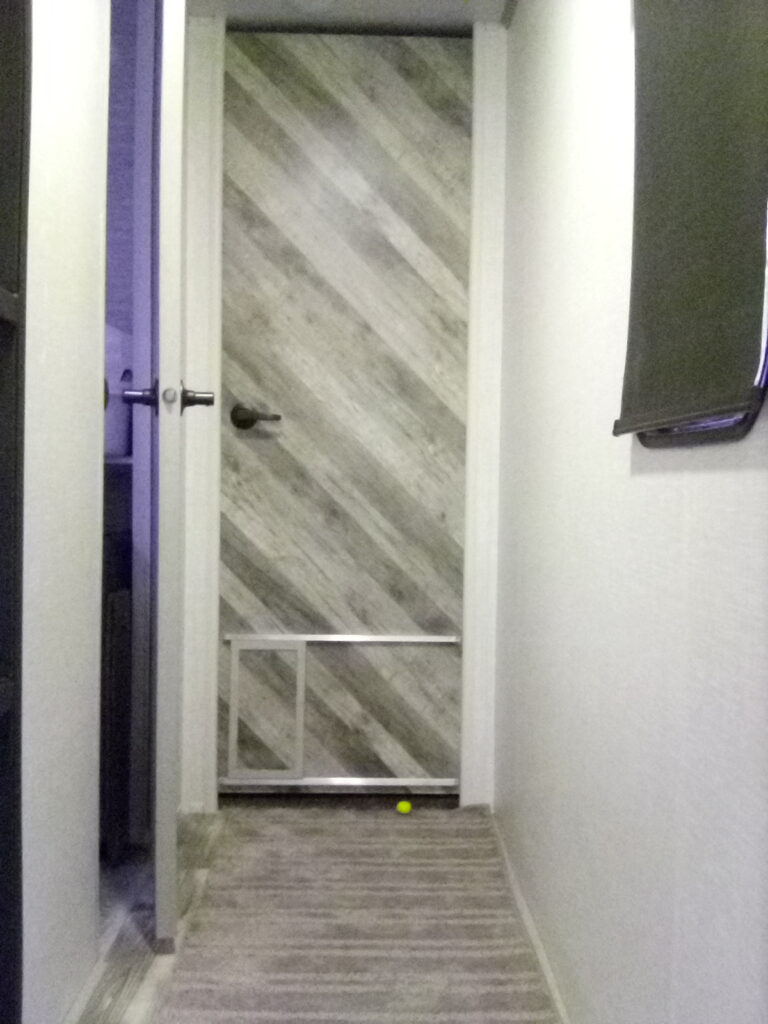
If you look carefully, you can see that the door panel cut-out design lines up with the door design, when closed. A prefabricated pet door might have been easier, but it would not have looked as goo.